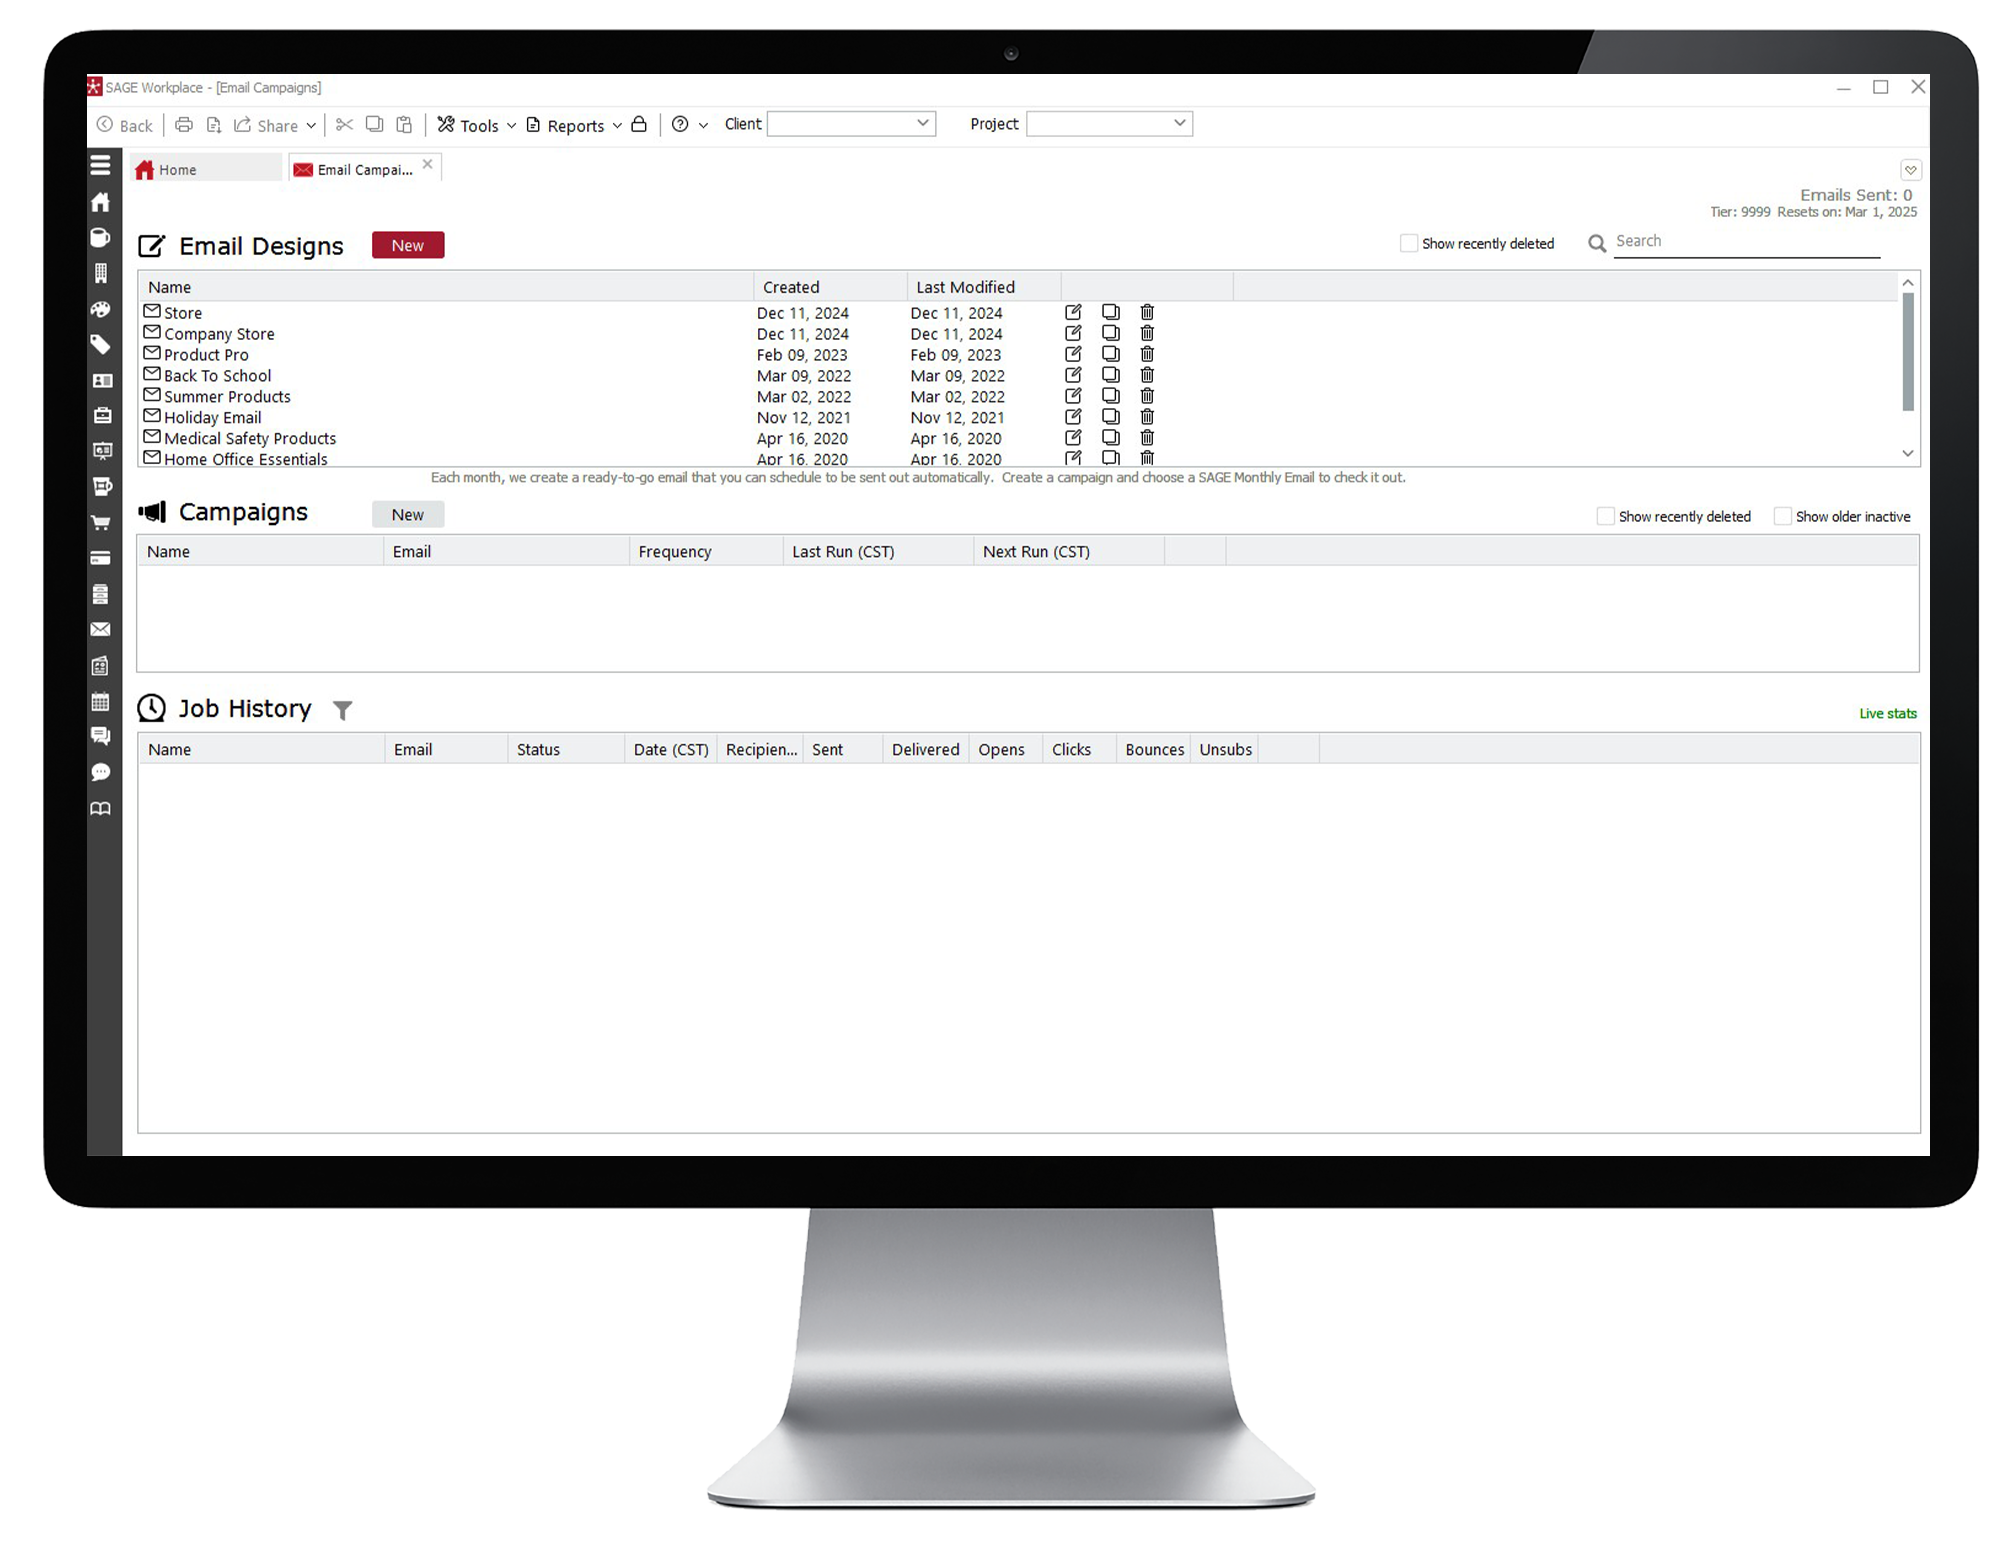
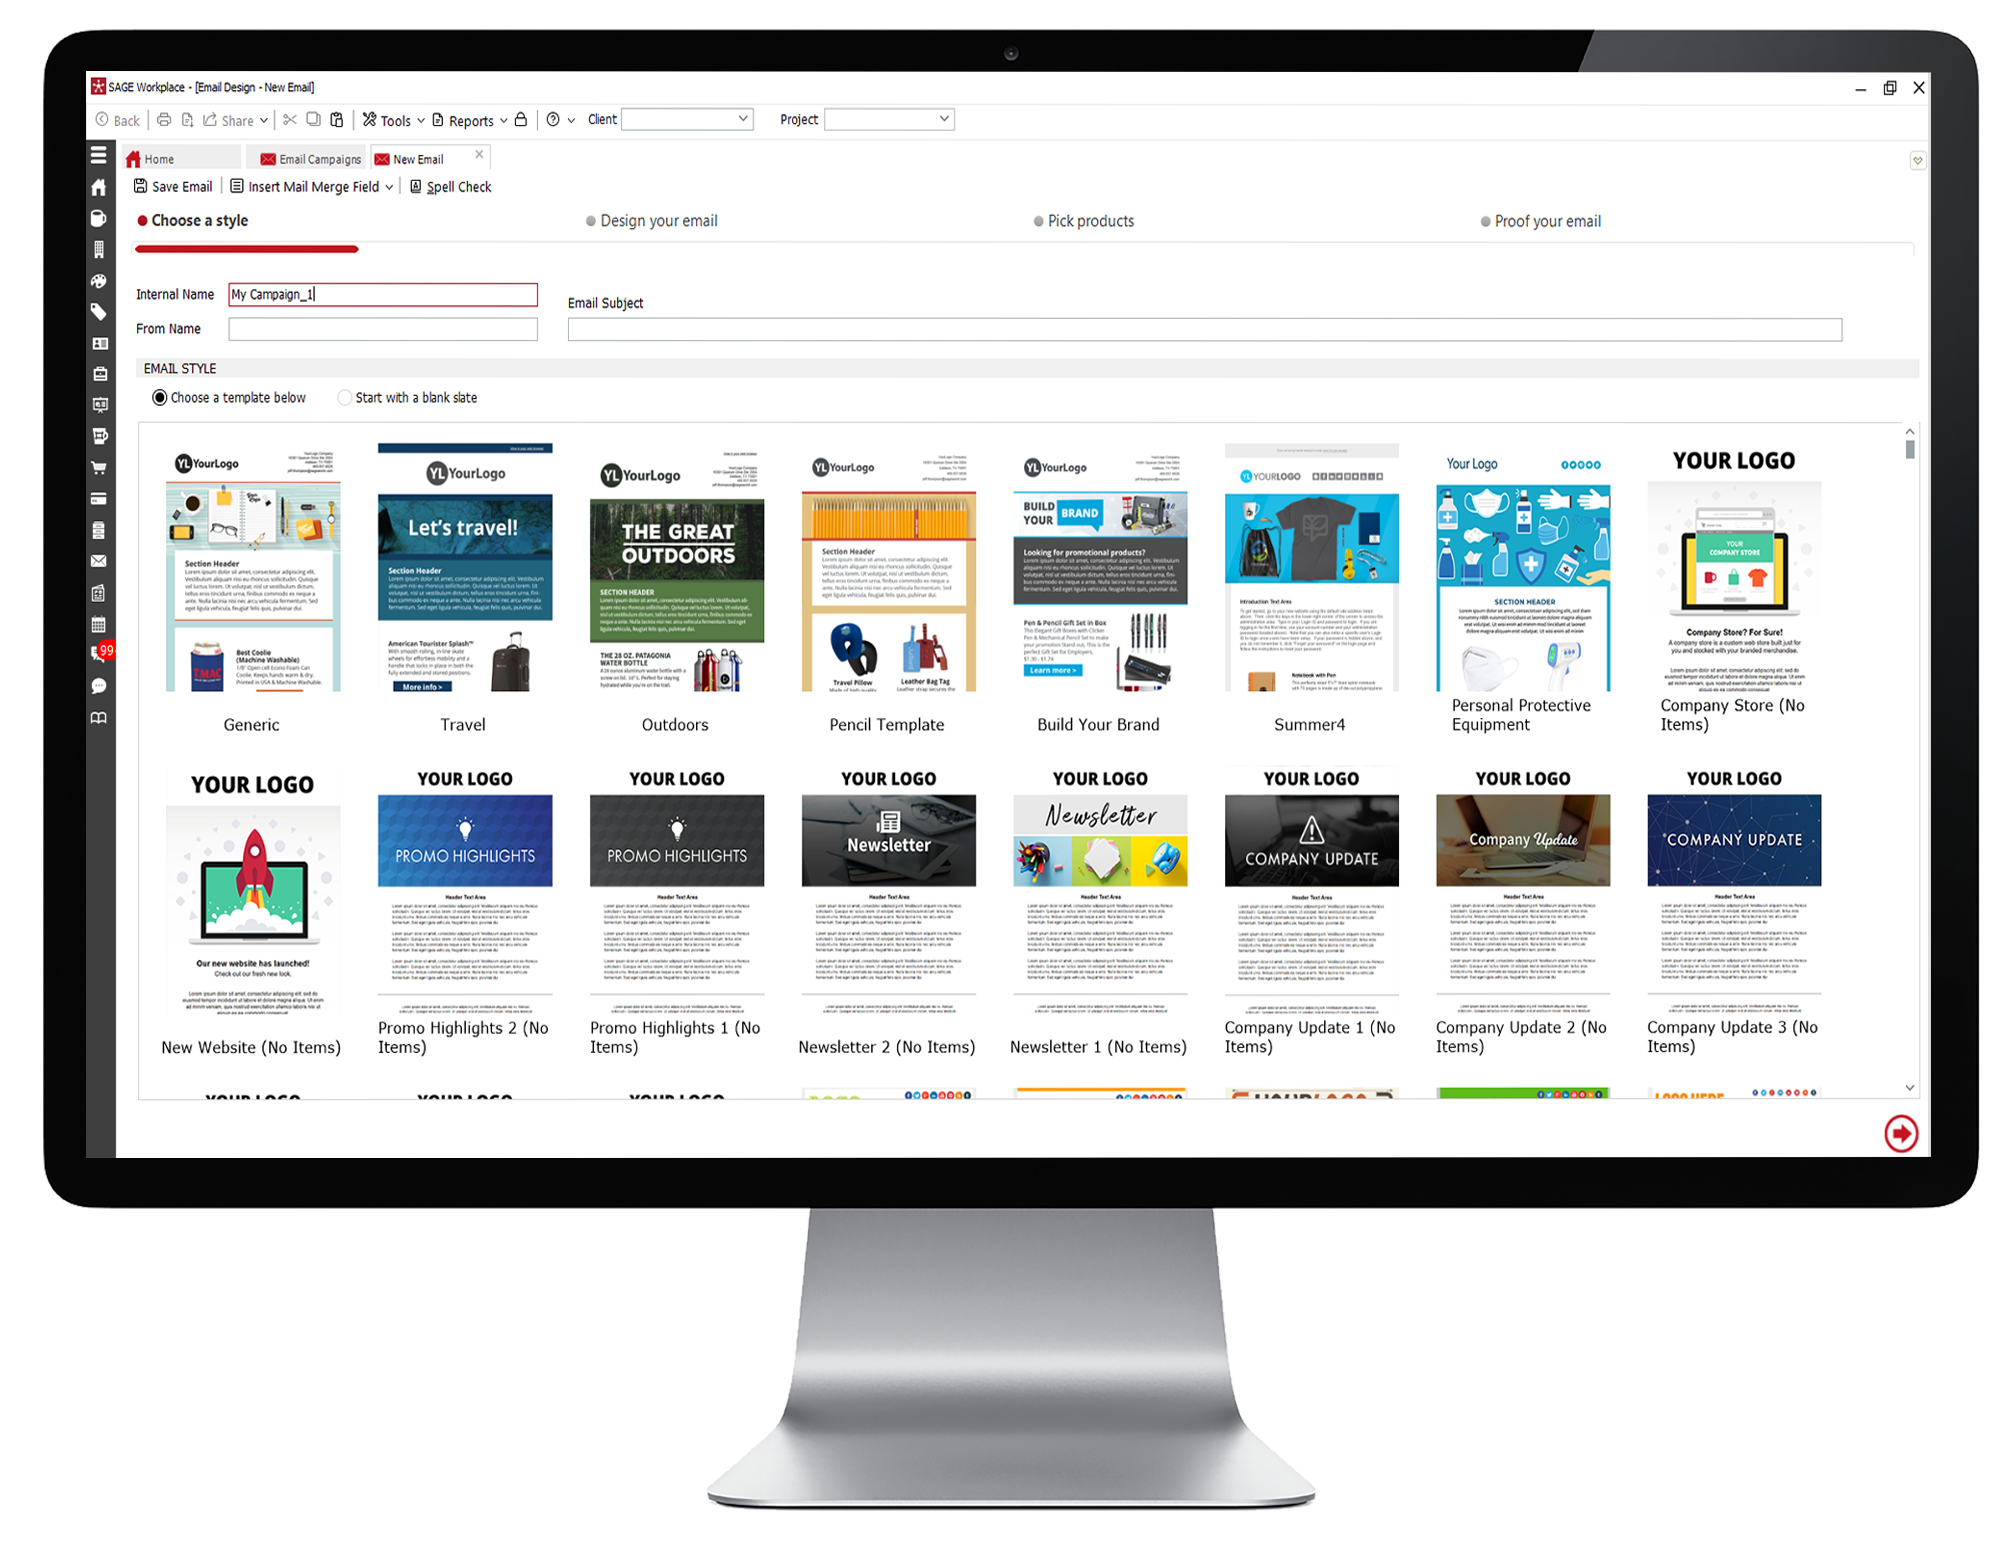
- Log into the SAGE Workplace Windows app and click on Email Campaigns on the left-hand navigation. Next, click on "New" next to Email Designs.
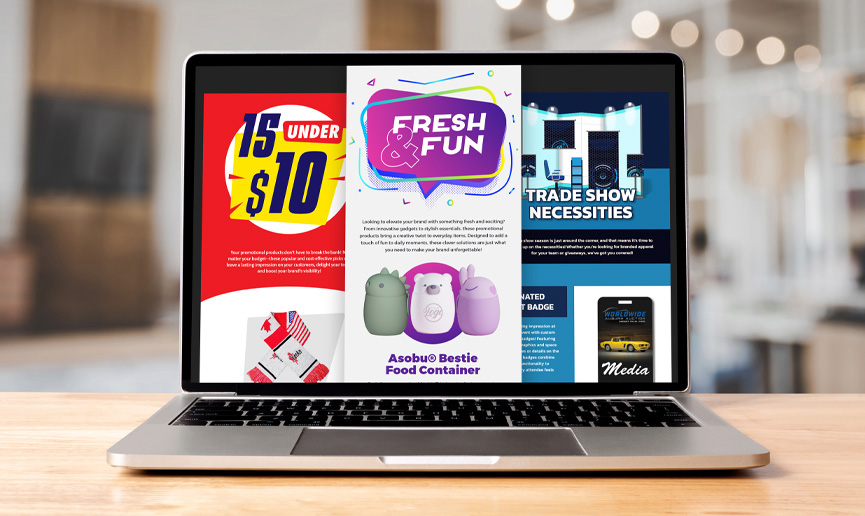
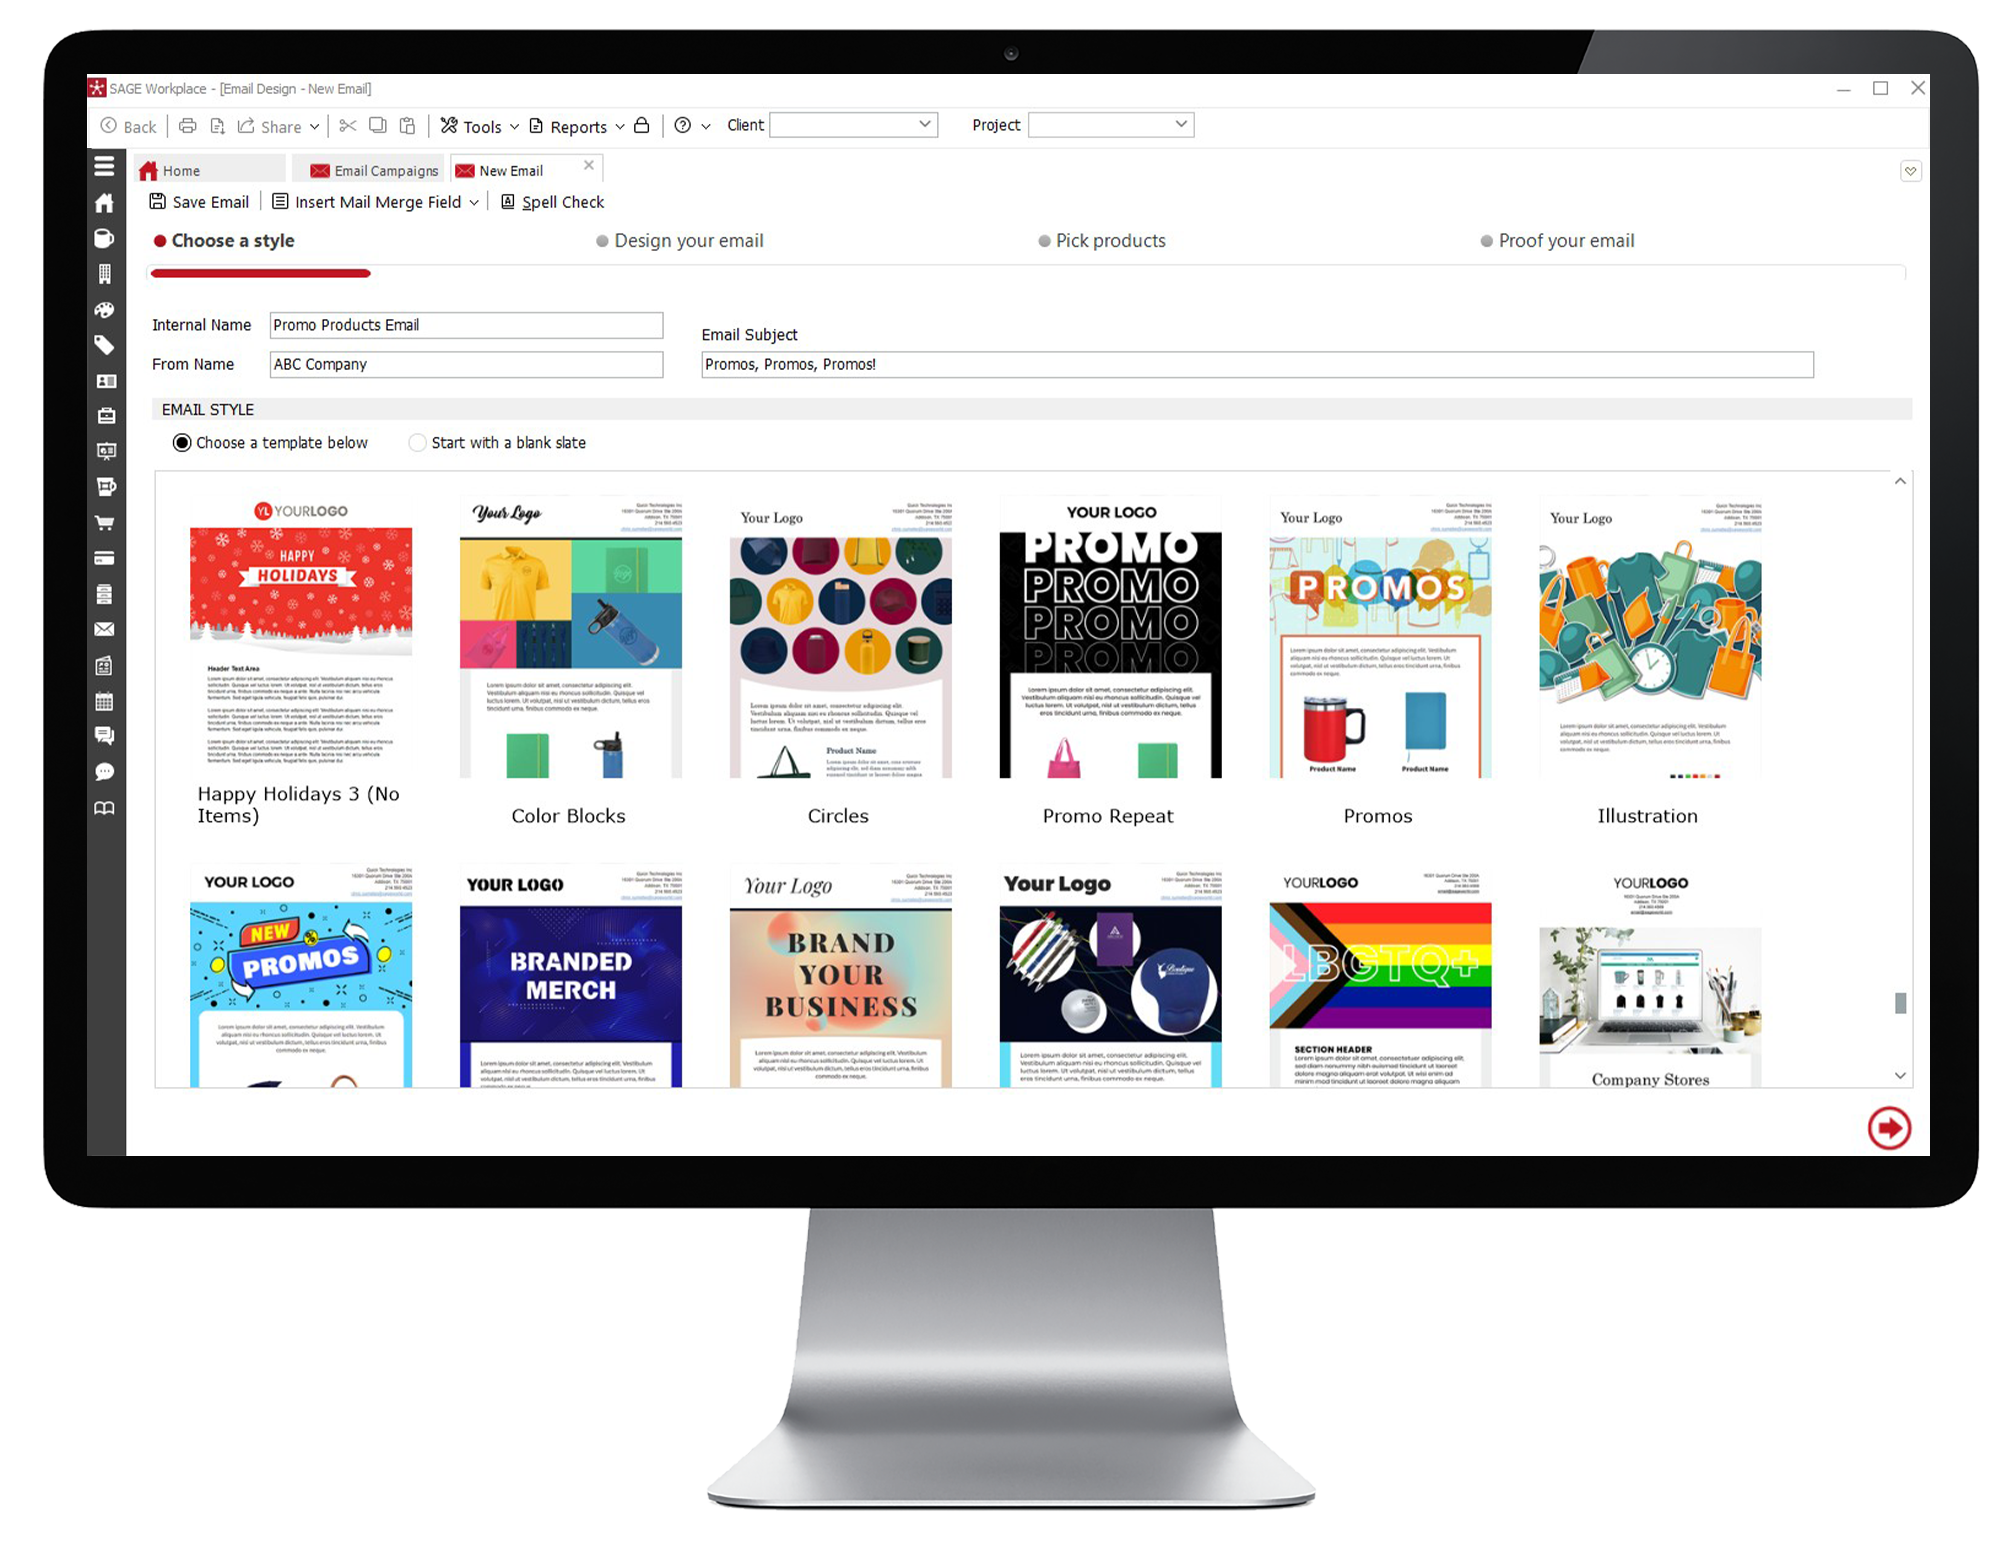
- Give your email an internal name, from name, and subject line. Choose a style for your email from our selection of pre-designed templates, including newsletter, themed product emails, and more, then click the Next arrow at the bottom of the page.
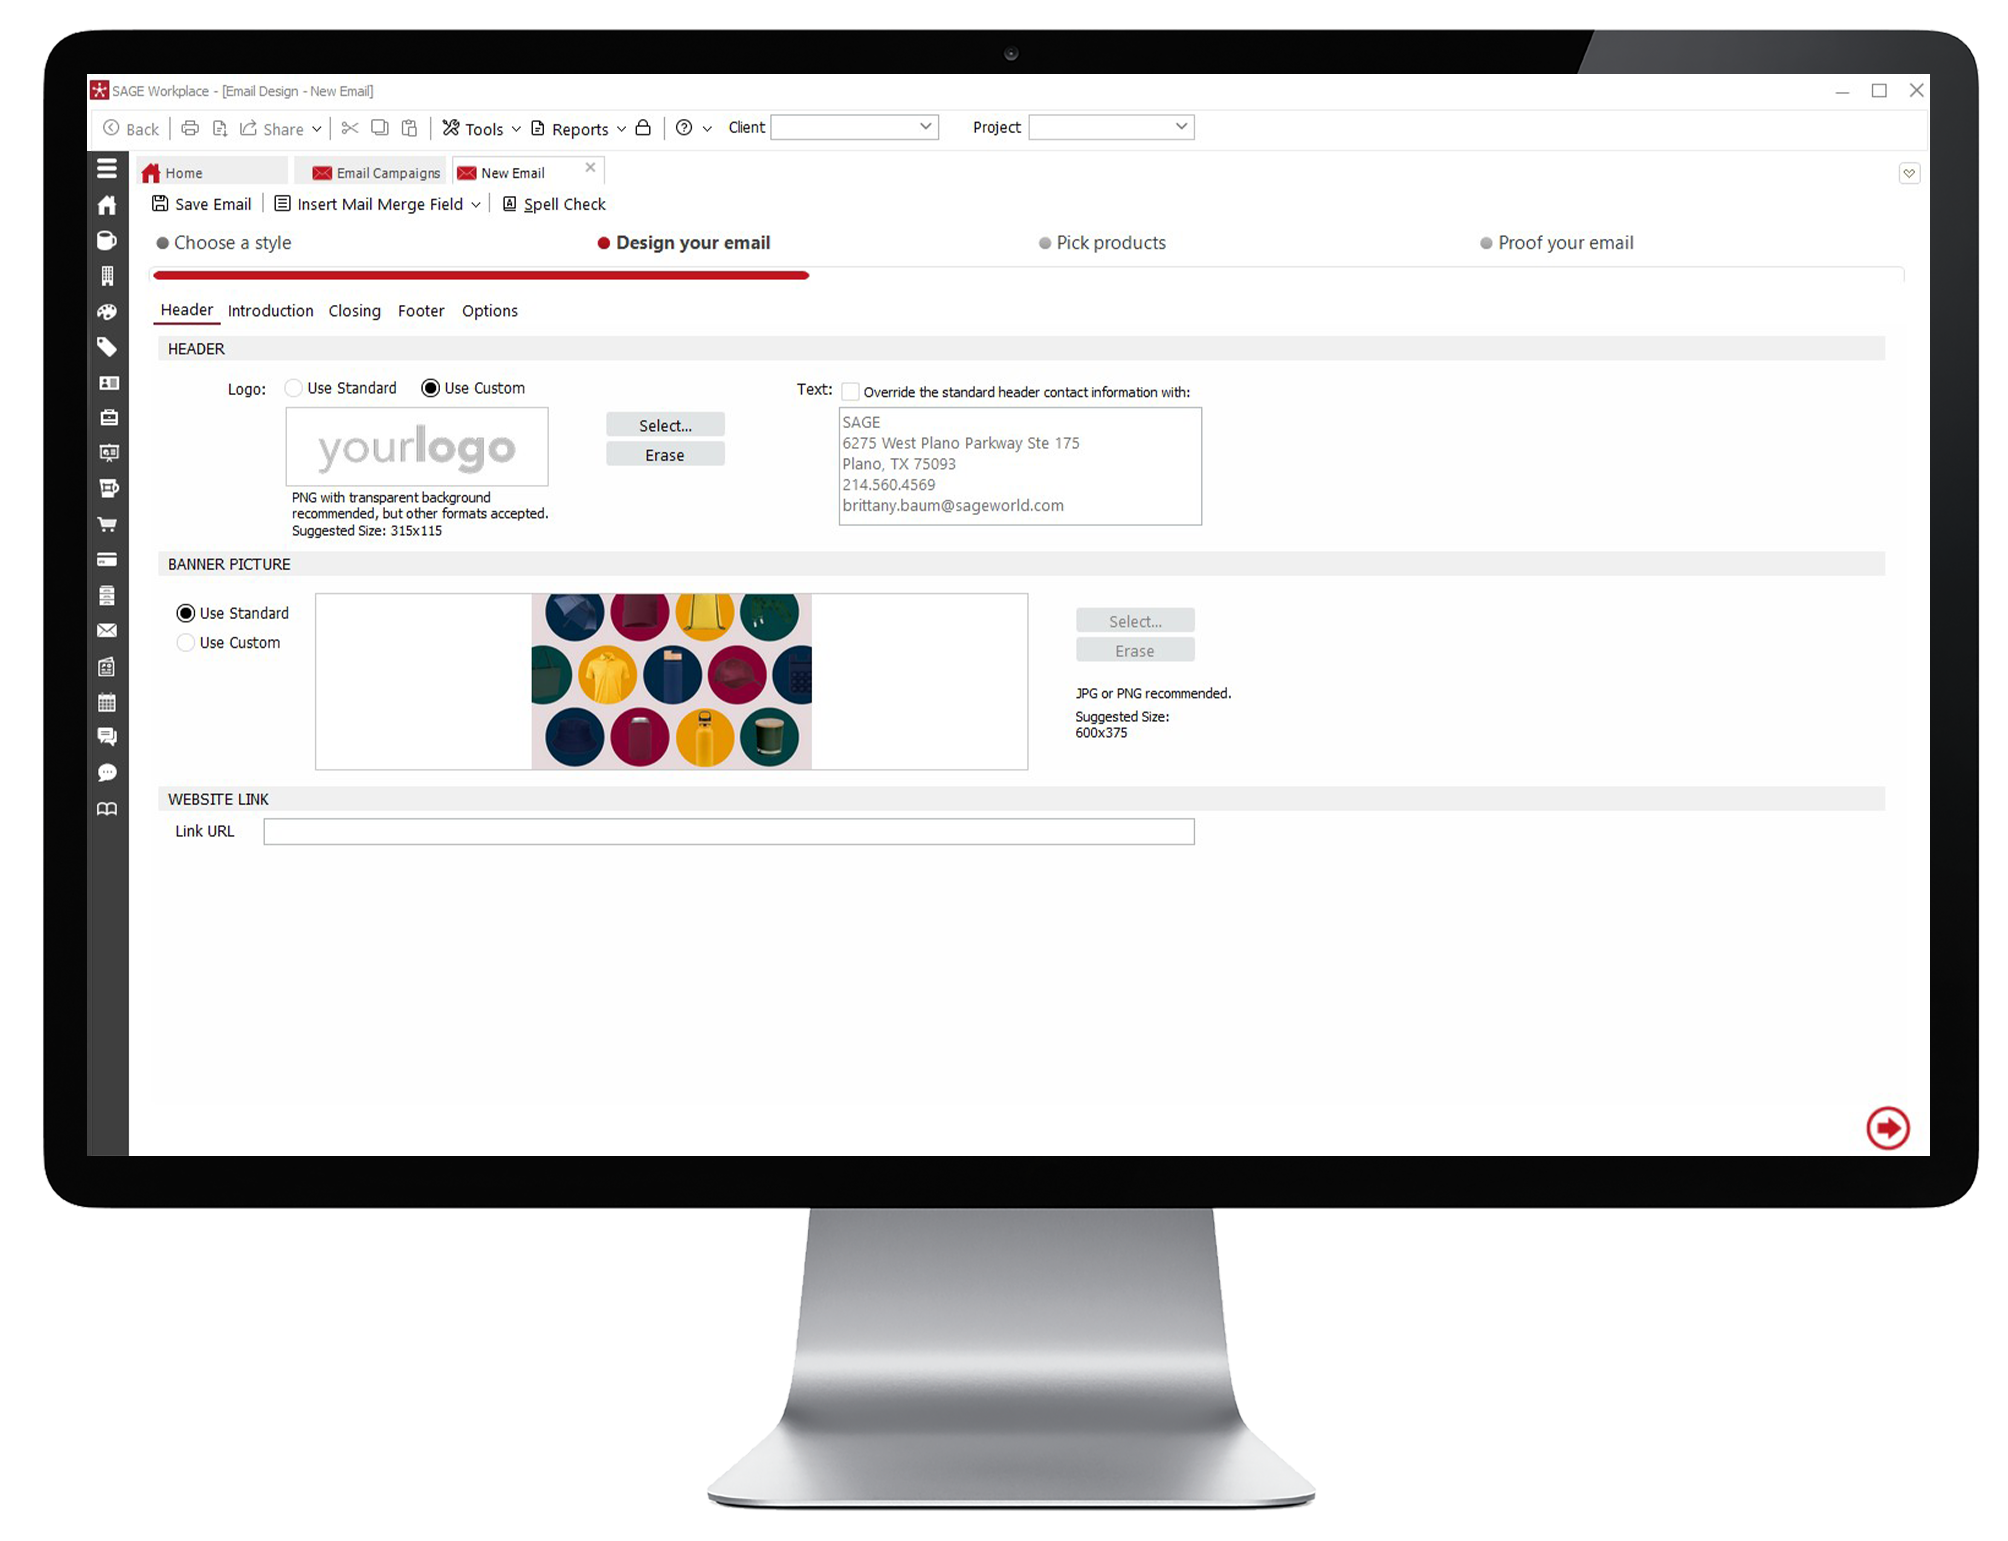
- Set up your email’s header. If your logo is already added in SAGE, it will automatically populate on your email, or you can select another logo in the box. If you would like to swap out the template’s banner image, select the Use Custom radio button and upload your own header.
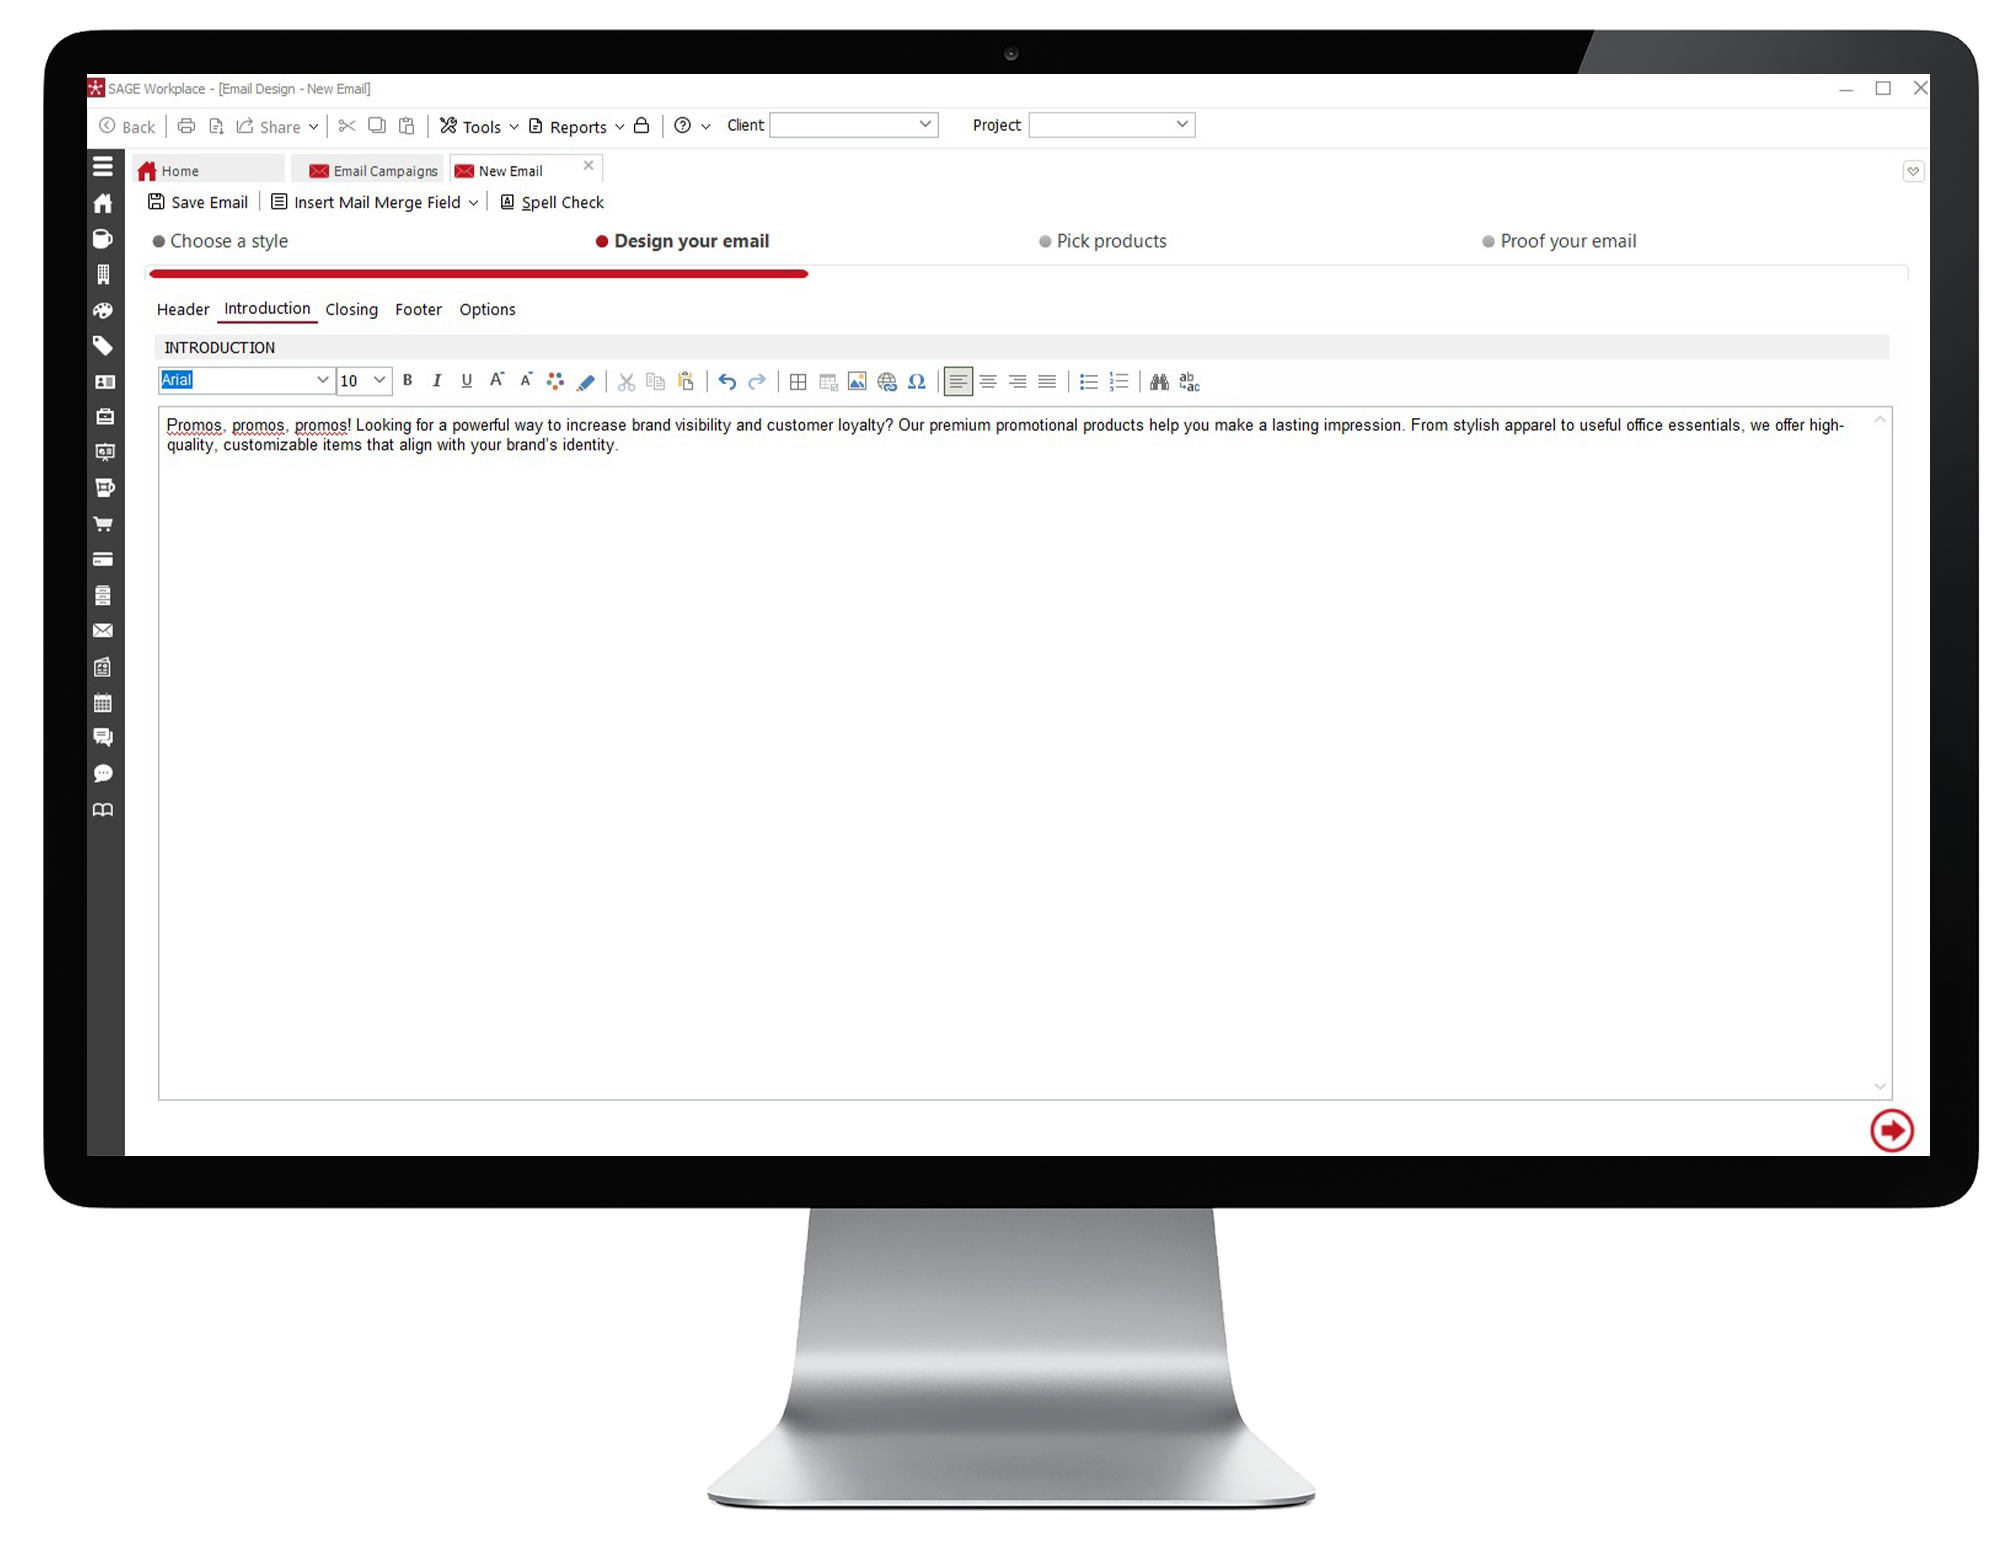
- Click the Introduction tab to add your intro text using the text editor, then do the same for the Closing tab. On the Footer tab, you can add additional footer text.
- Use the toggle on the Options tab to select whether you’d like to show social media icons on your email. Then click the arrow at the bottom of the page to move on to choosing products.
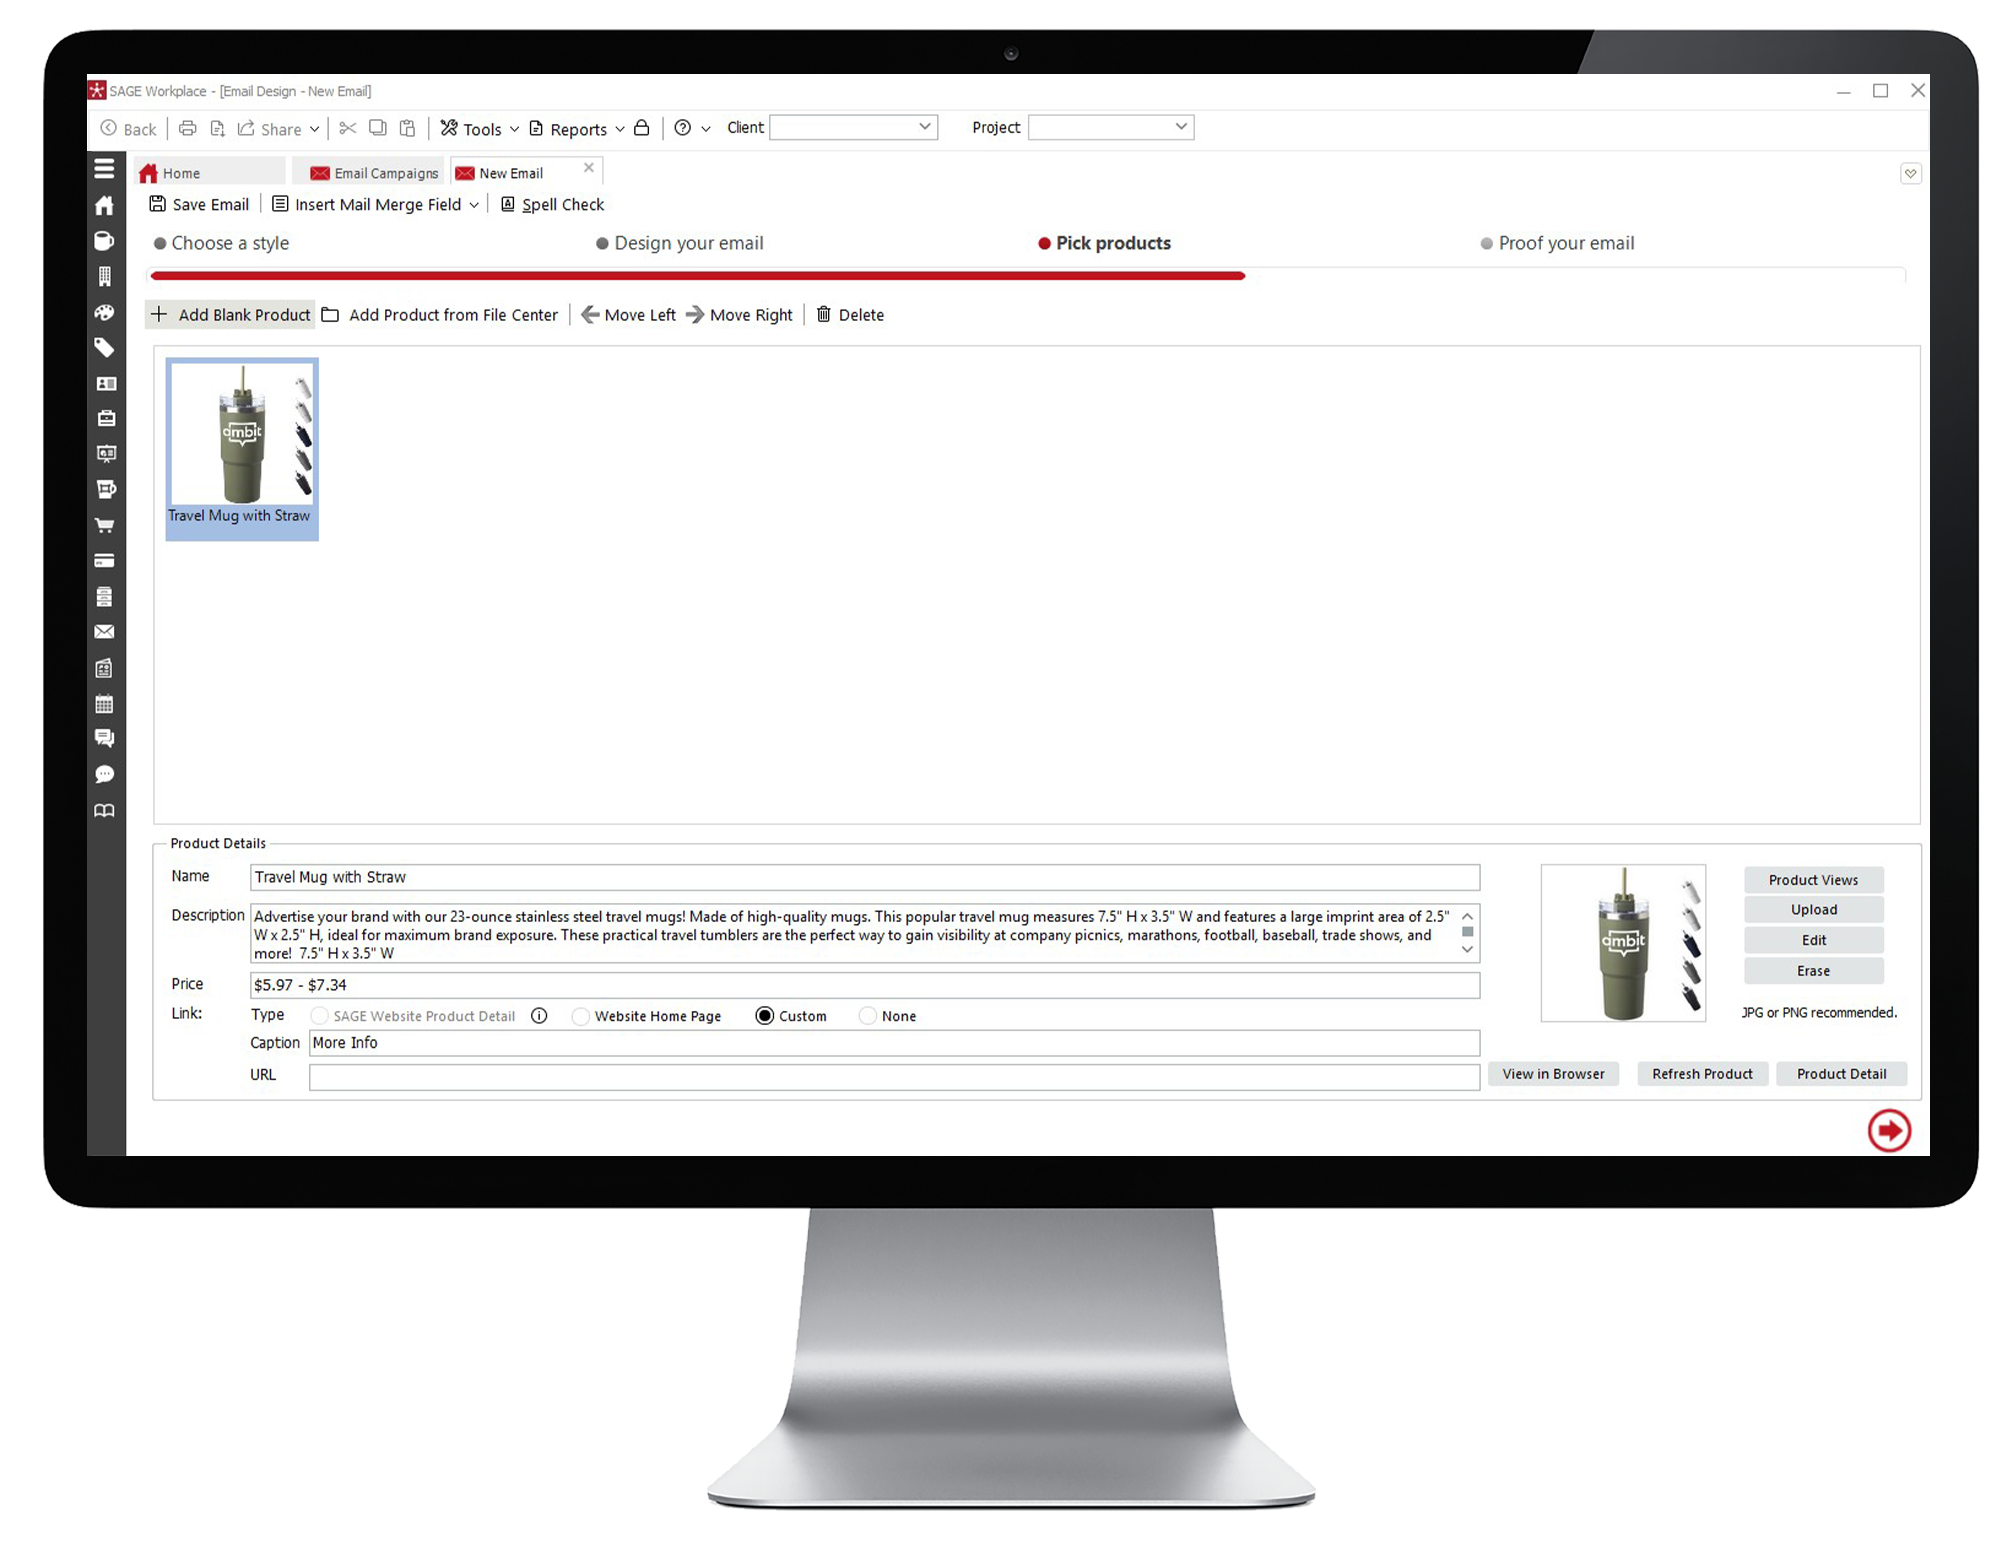
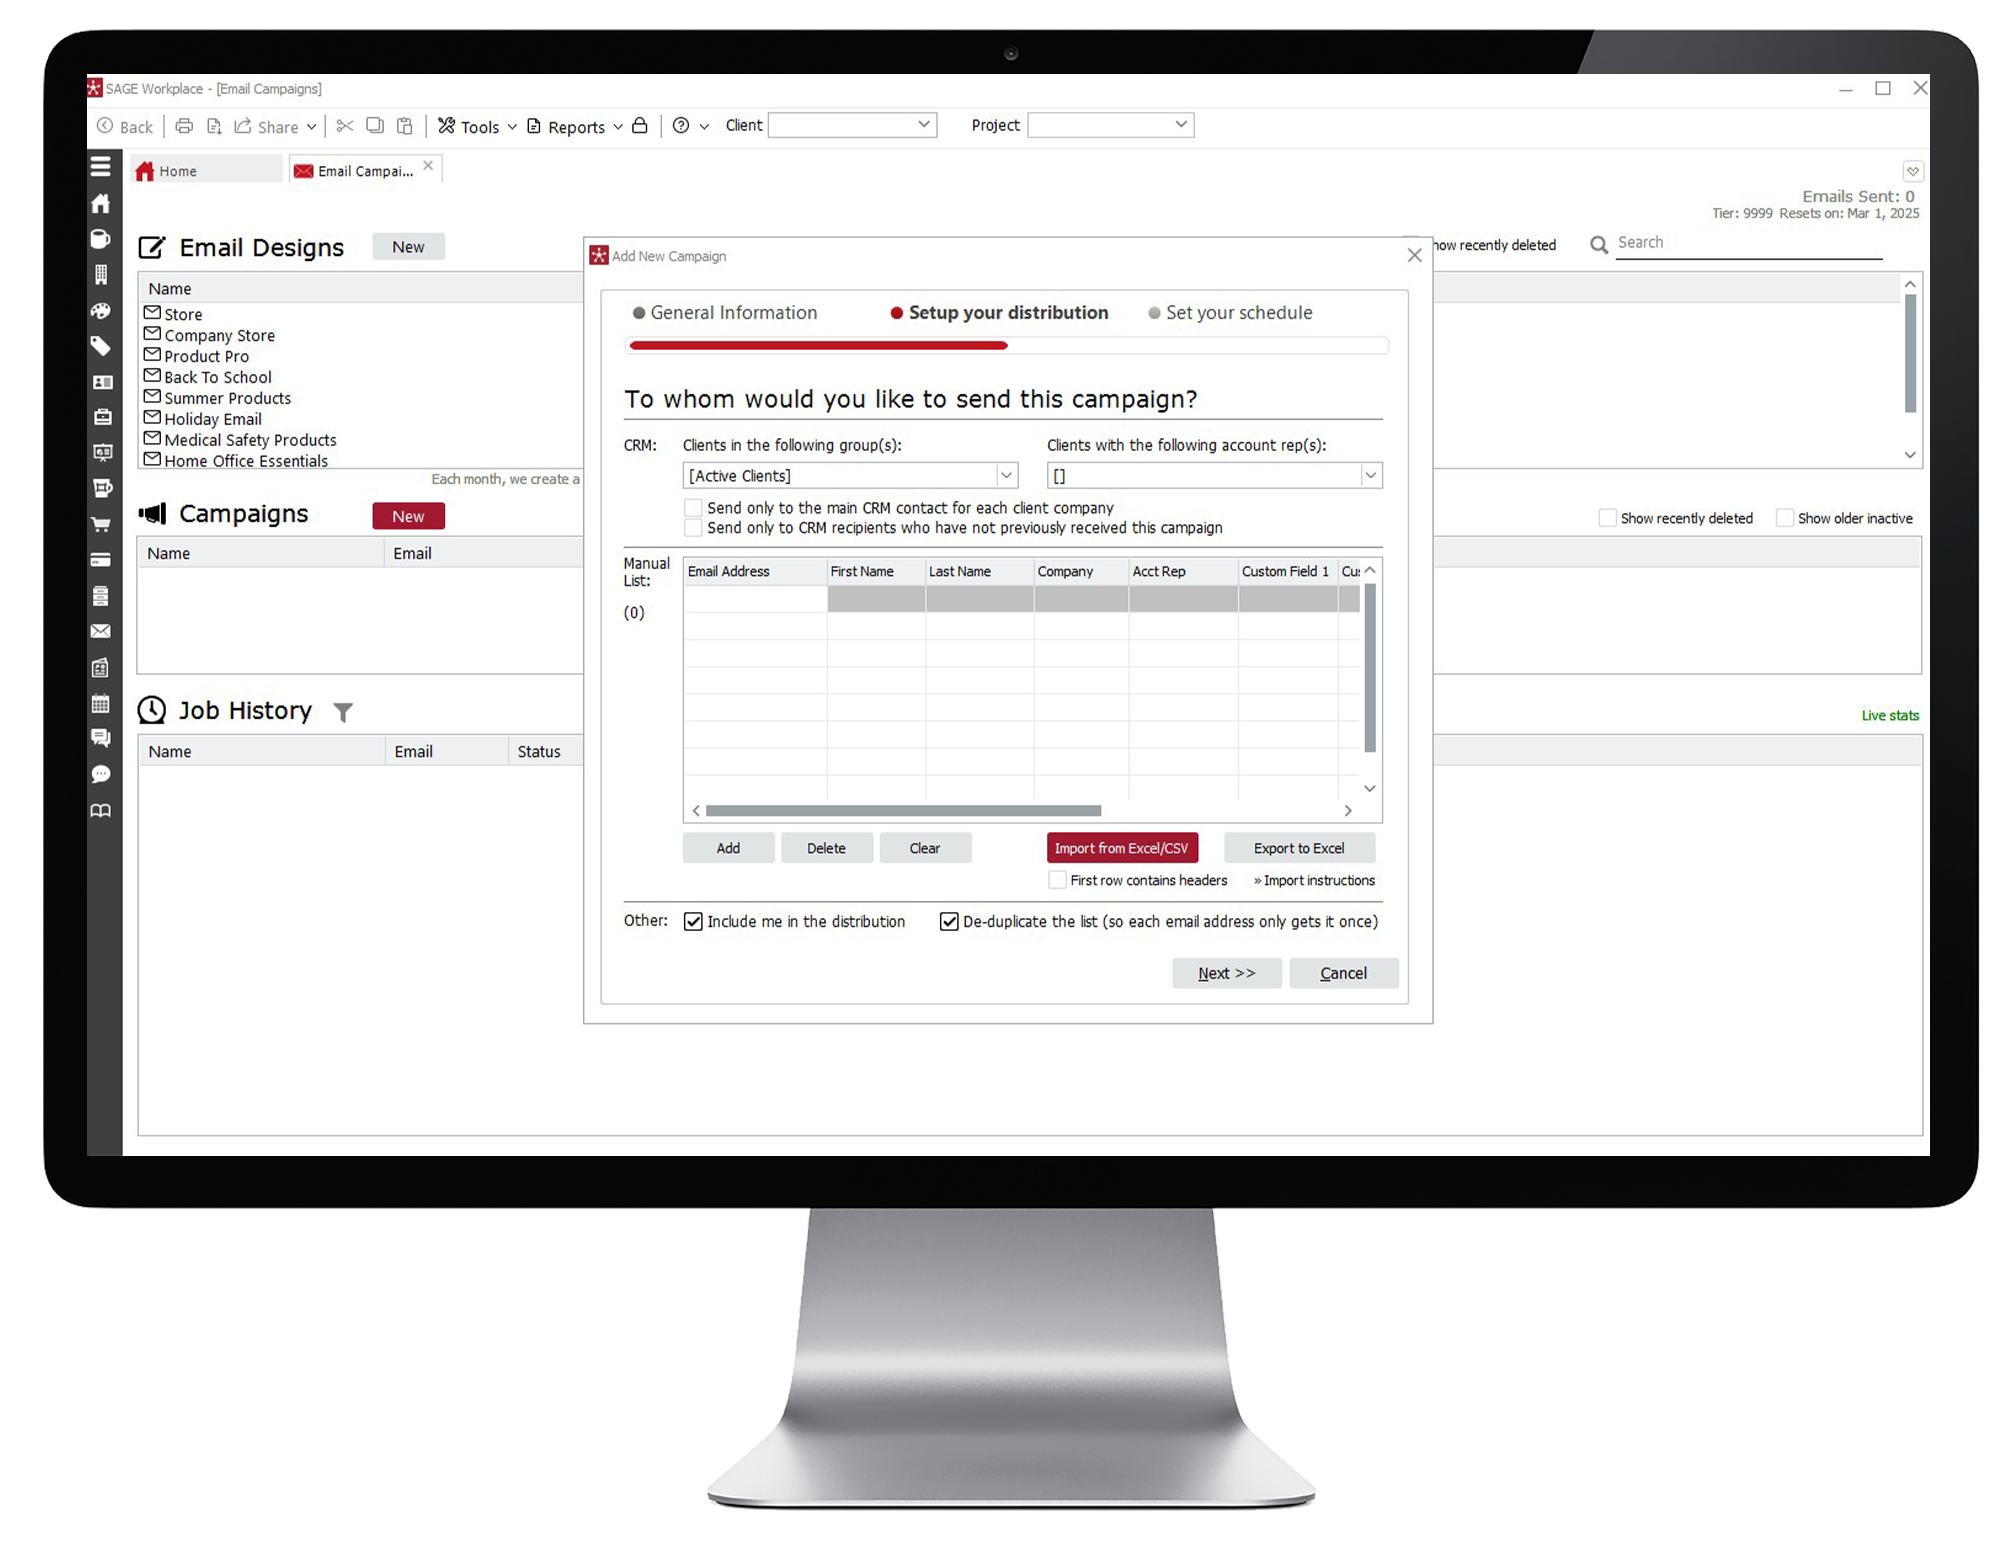
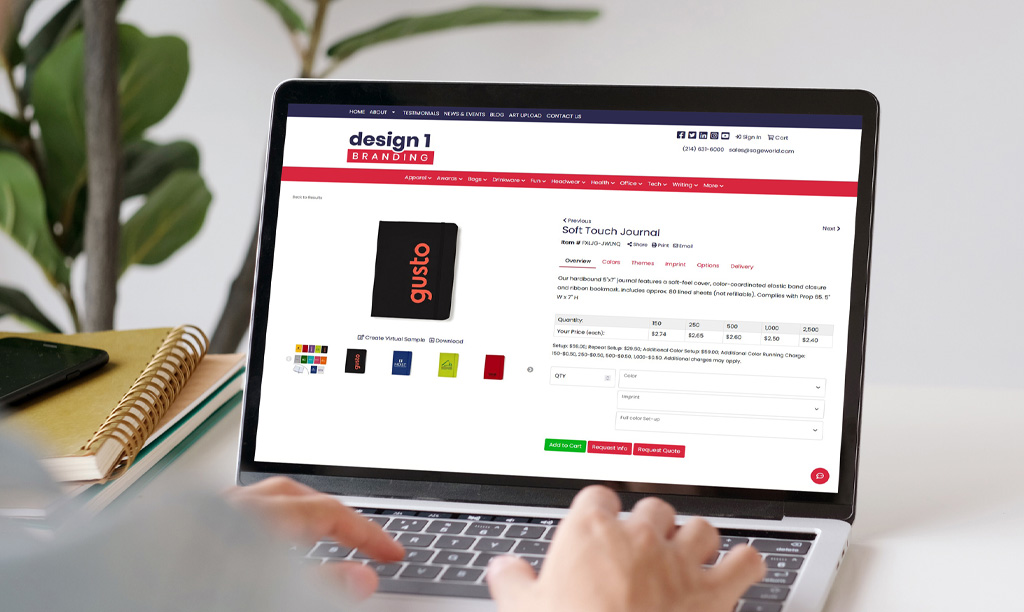
- You can add products to your email from scratch or from the File Center. To add a product from scratch, click on + Add Blank Product. Enter a name, description, and price for your product and upload an image by clicking Upload.
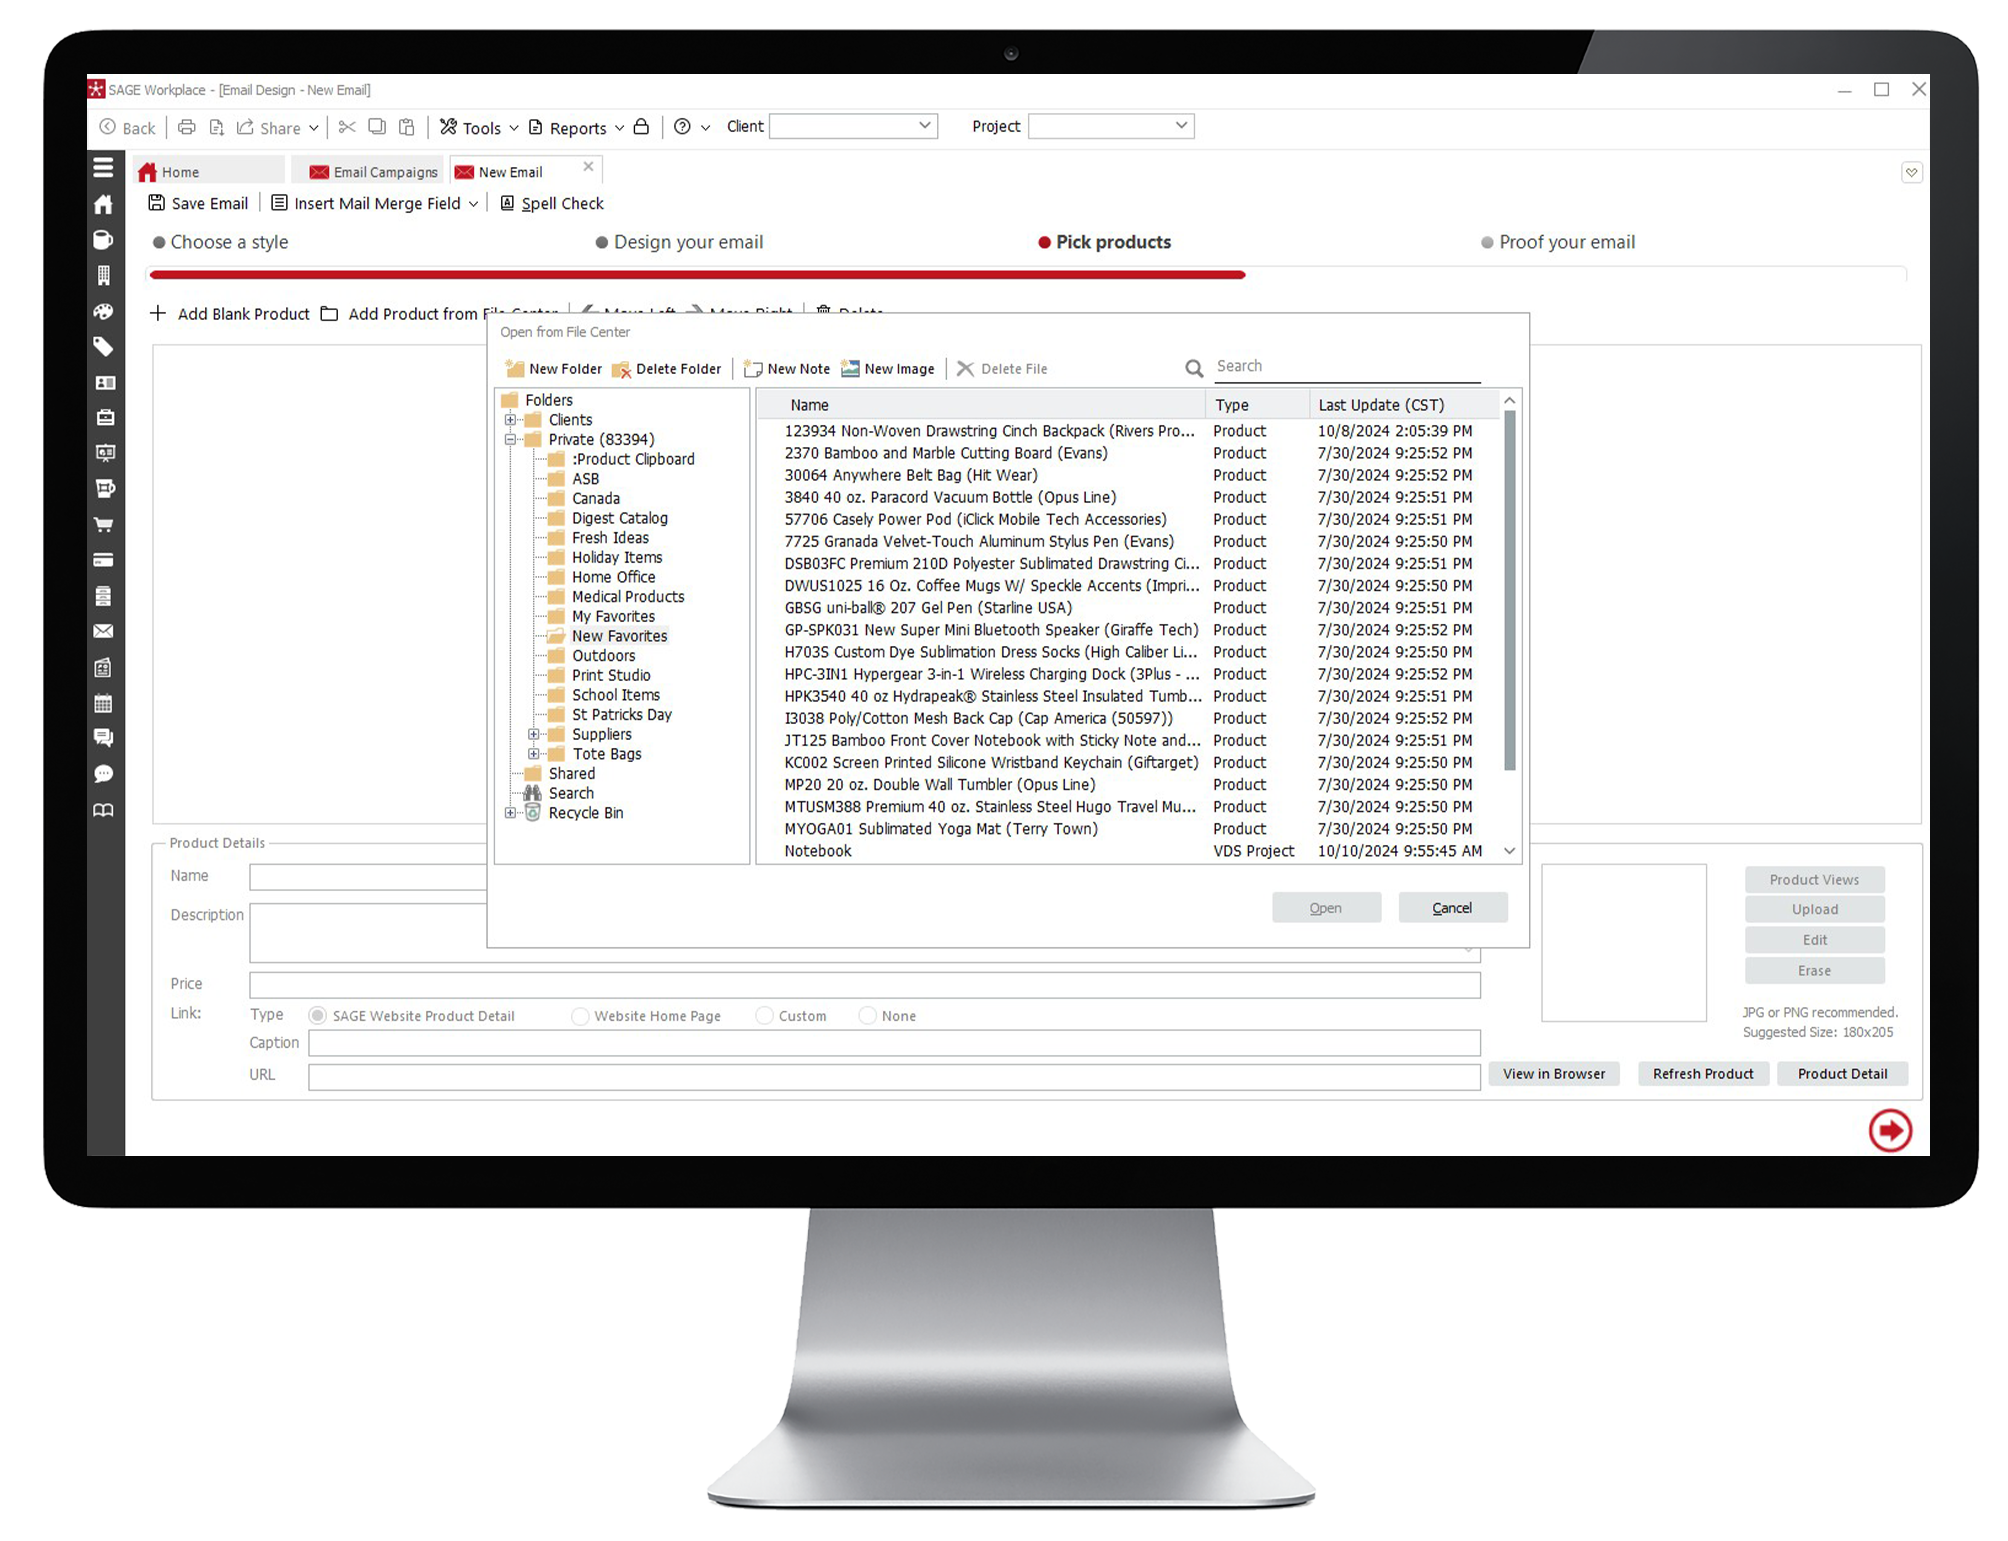
- To add a product from the File Center, click Add Product from File Center and select your products from the menu. You can also add products right from your search! To add an individual product, you can either open the product page and then select + Email Campaign, or you can select the small checkbox, right click on the product, and then select Add to email design. If you’d like to add multiple products to your email campaign from a single search, select each product by clicking on the small checkbox, then select + Email Campaign at the bottom of the screen. You can also drag and drop products from a product search in another tab onto your email campaign. Simply click and drag the product from the search tab to your email campaign.
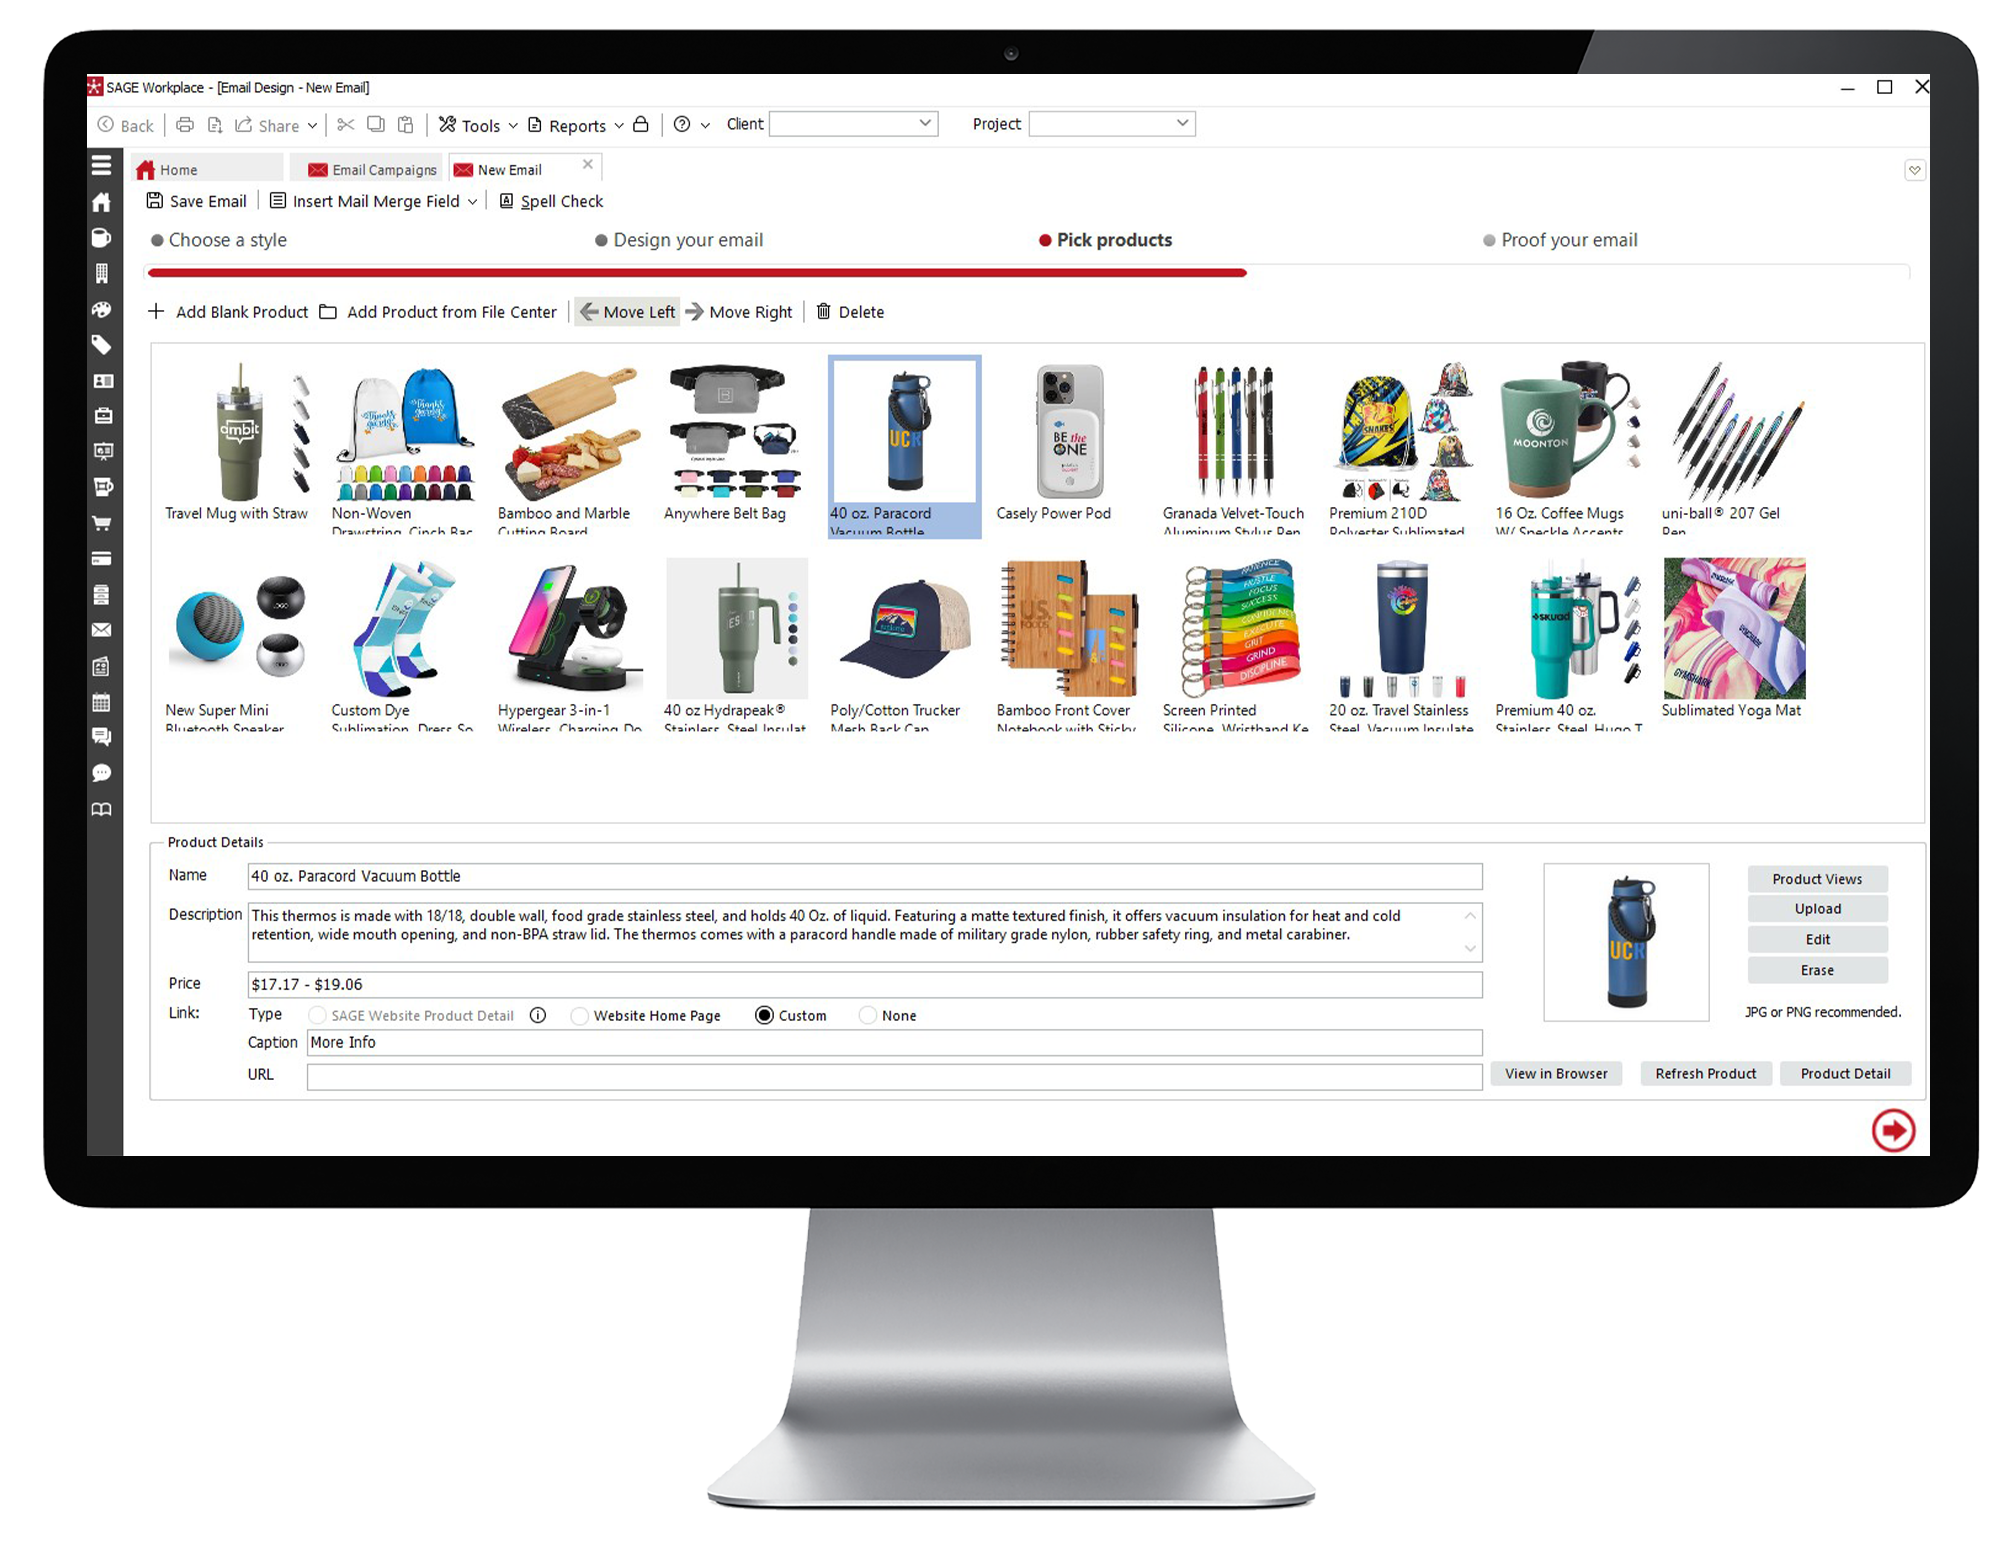
- Arrange the order of products by clicking Move Left or Move Right at the top of the page, or by dragging and dropping the product to the desired location. You also have the ability to change the product image, and you can also remove a product by clicking Delete Product. Once all your products are added, click the arrow to move to the next step.
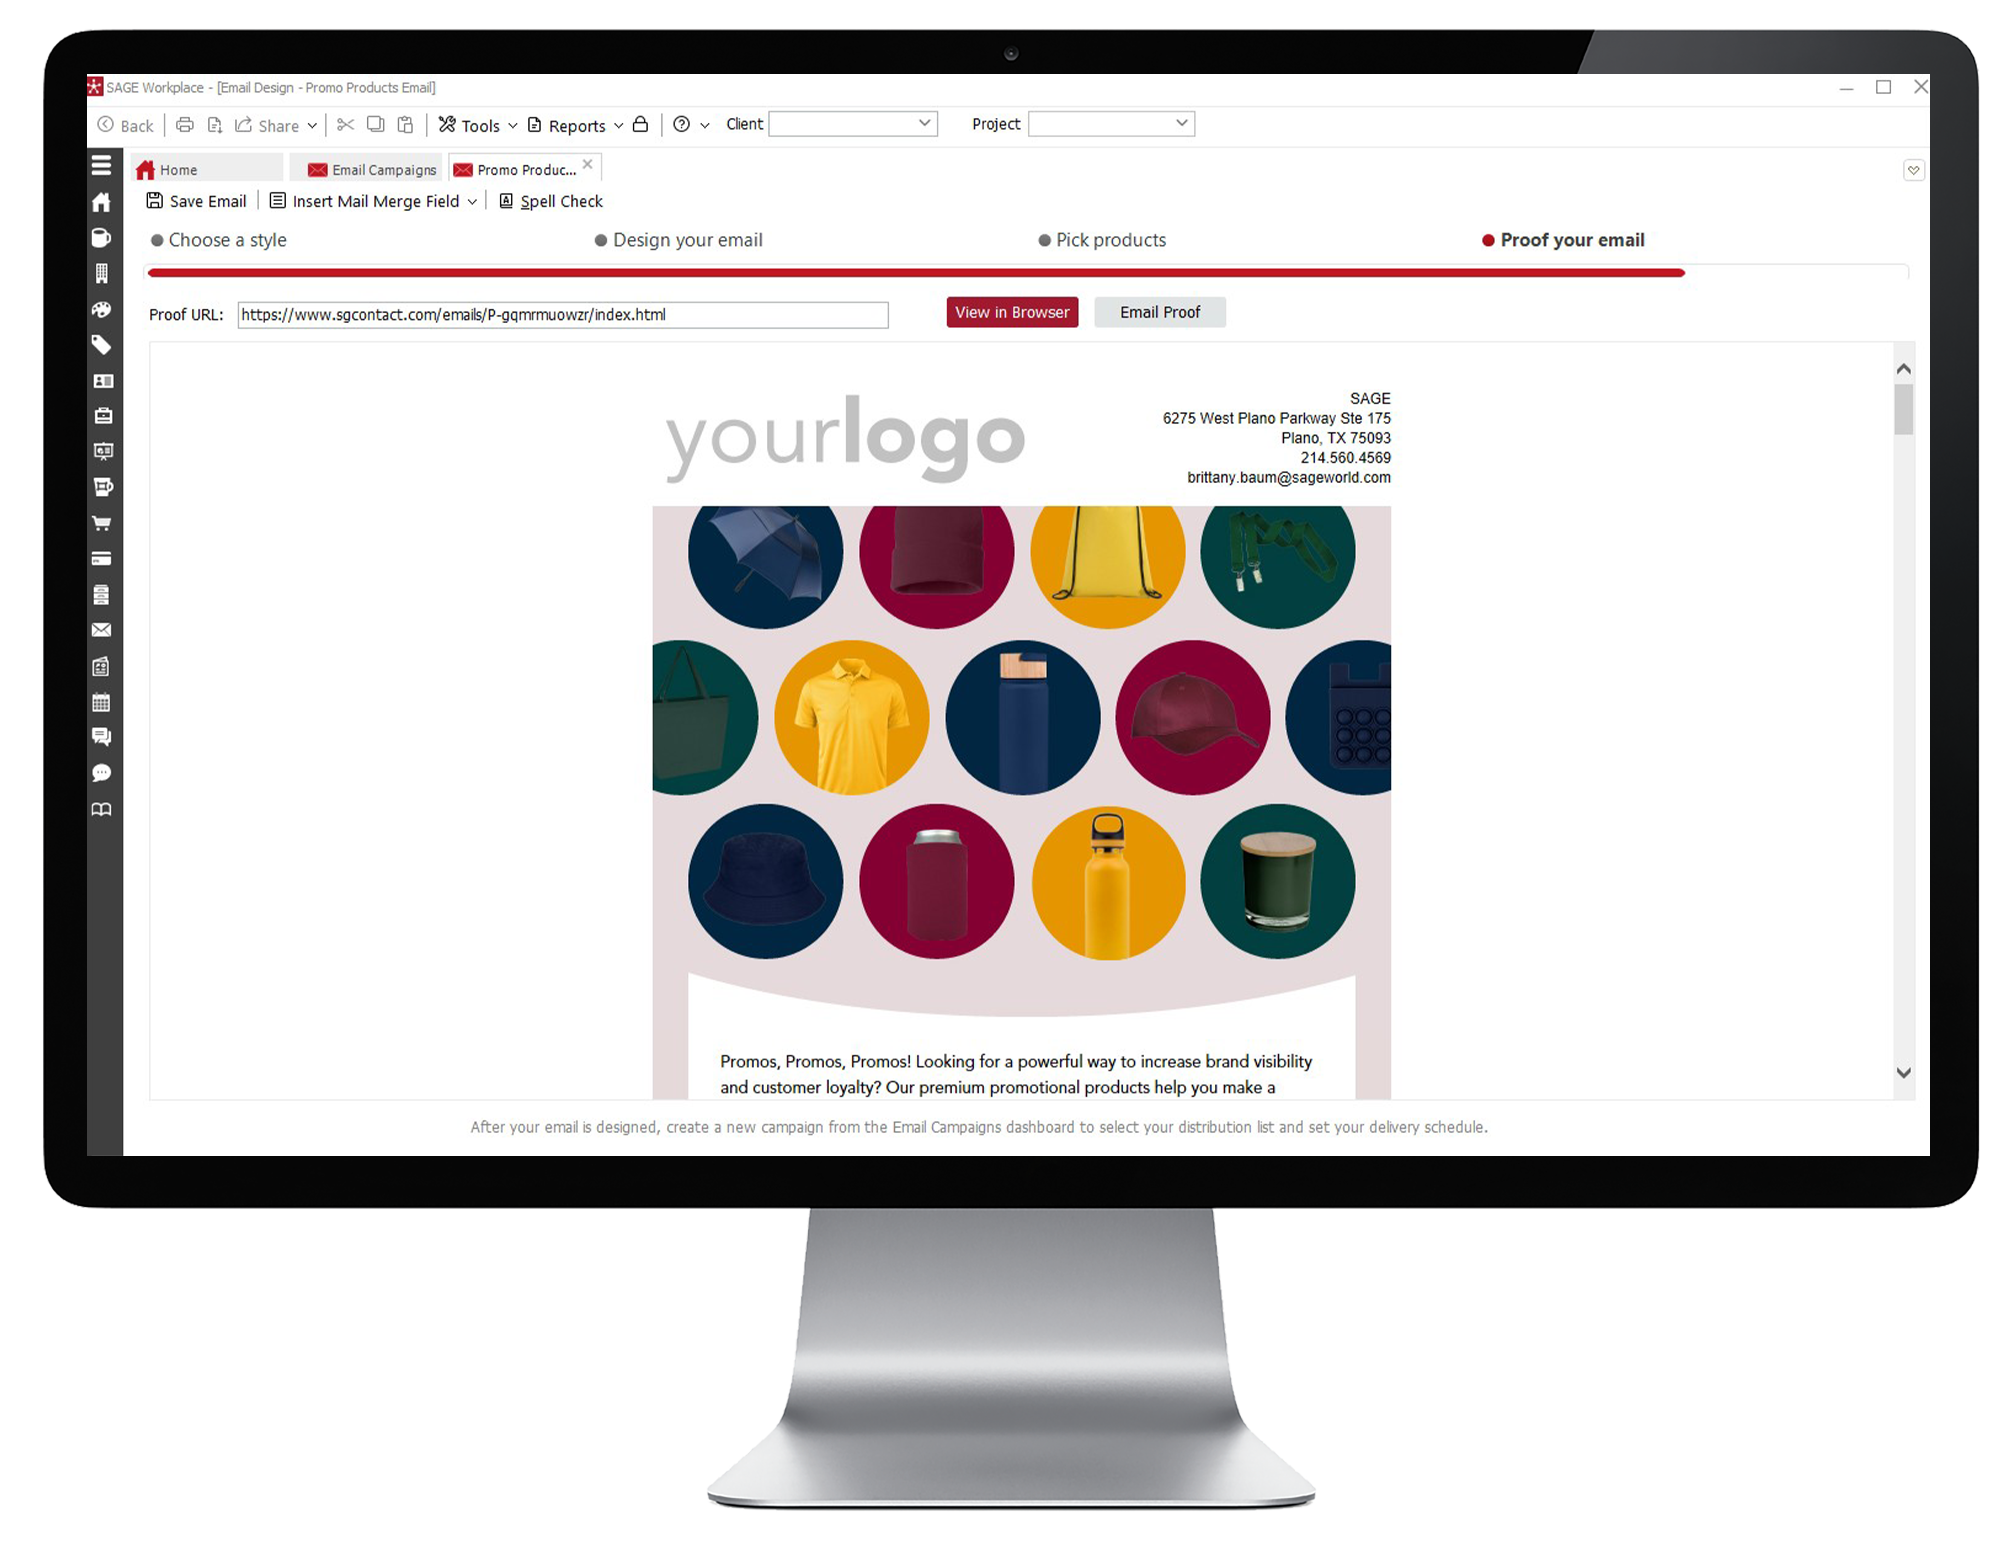
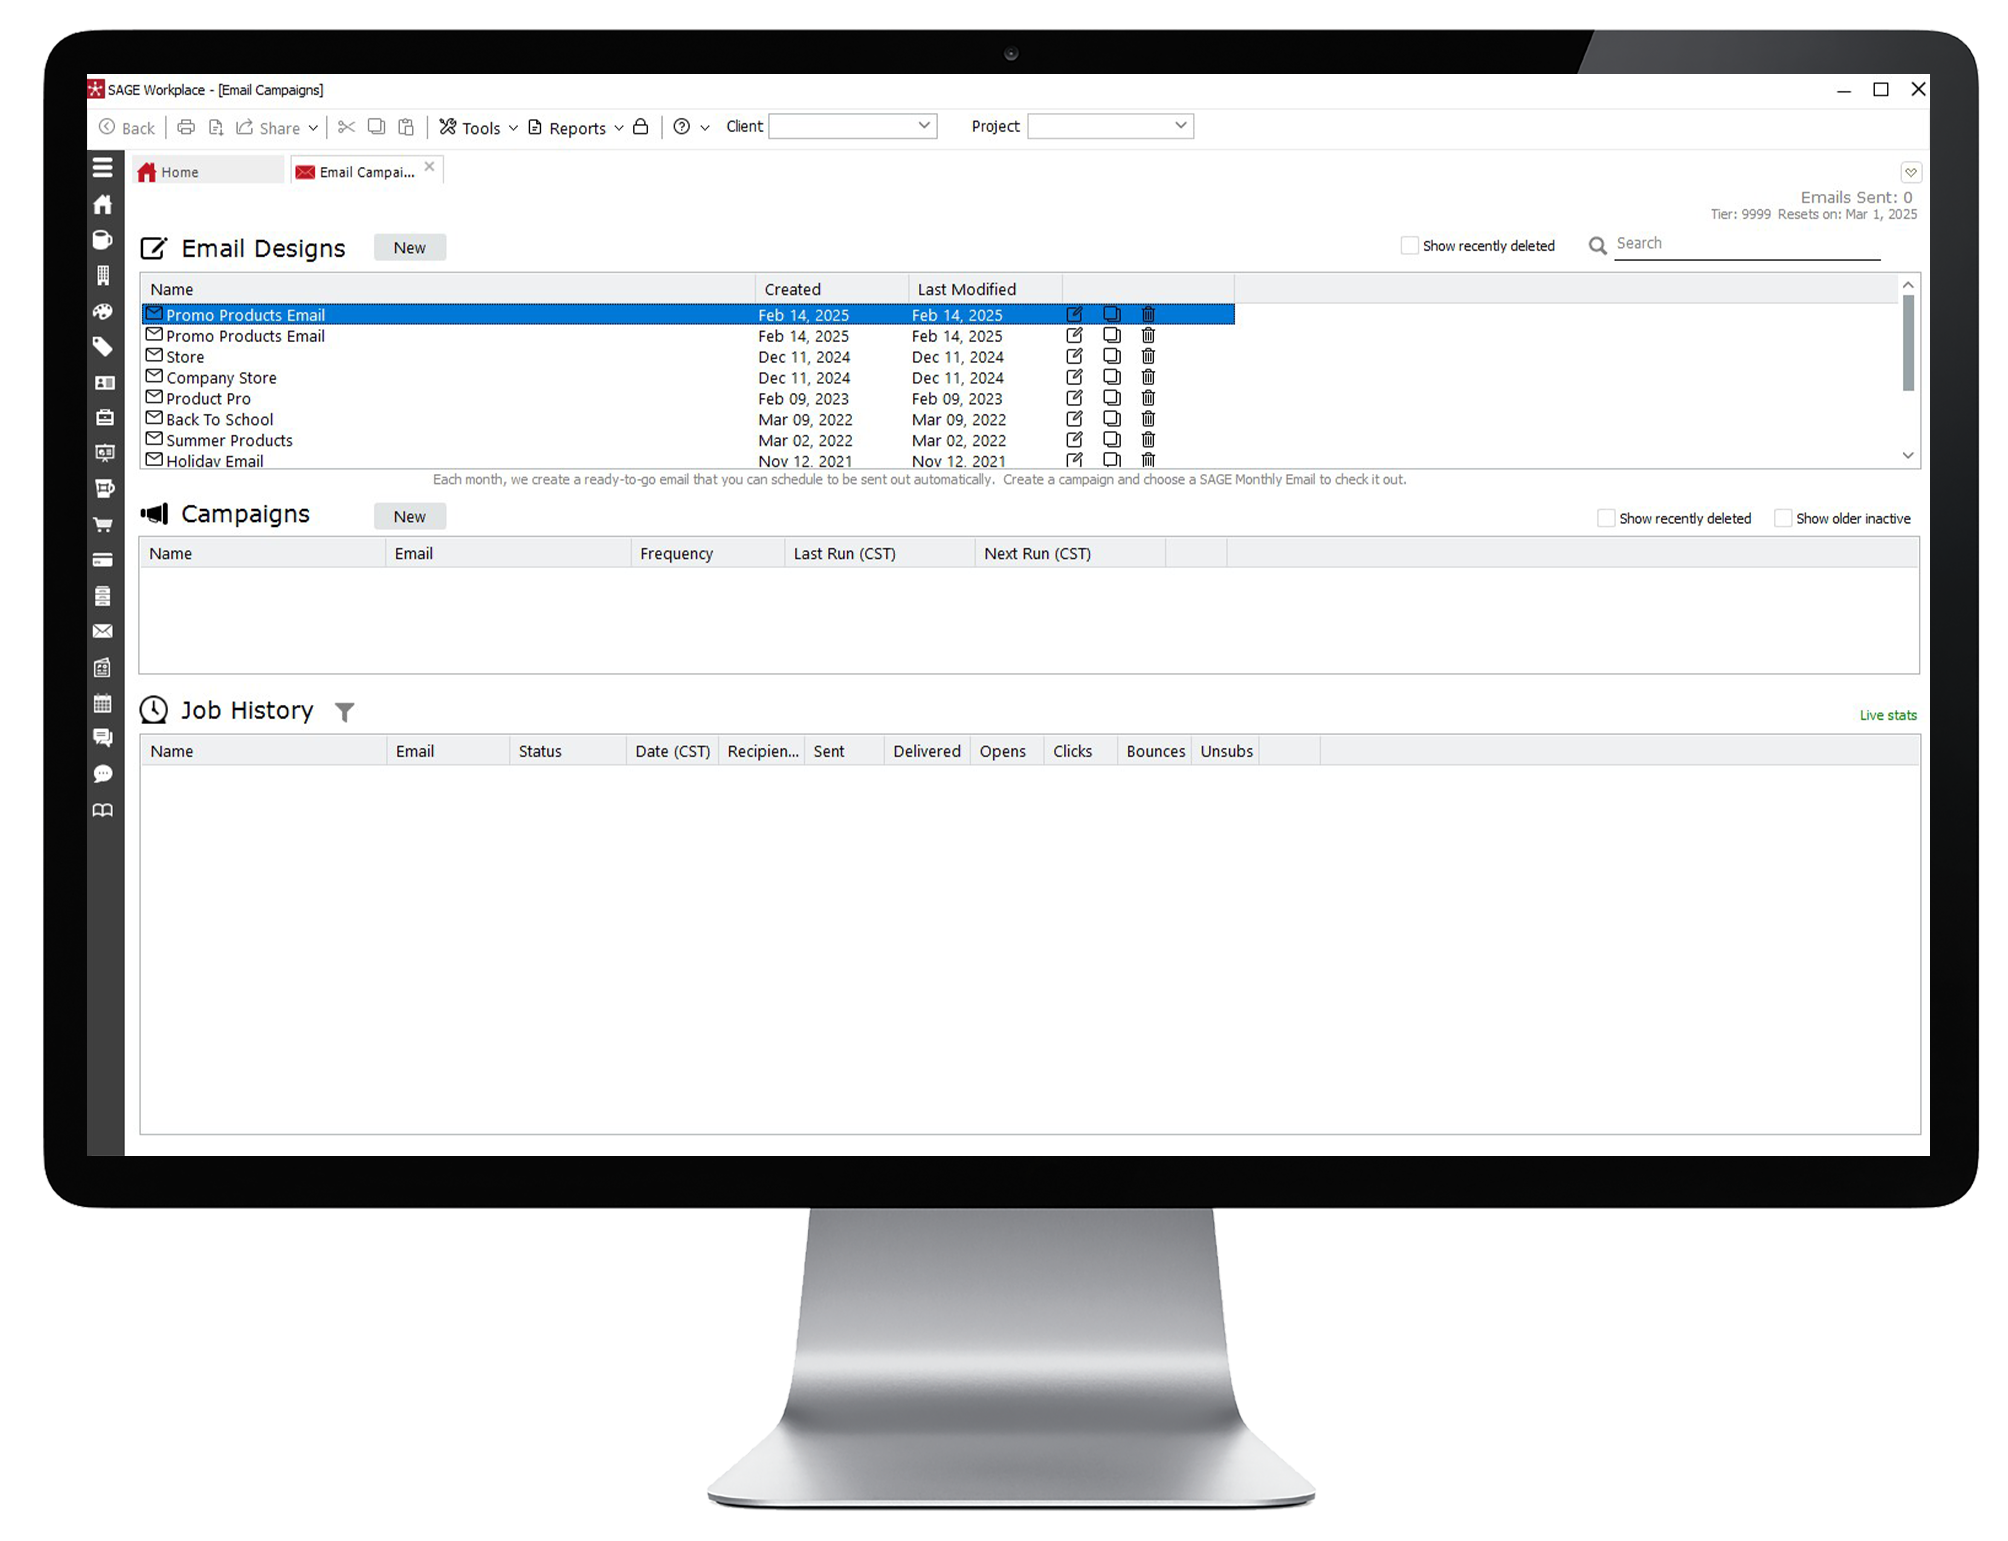
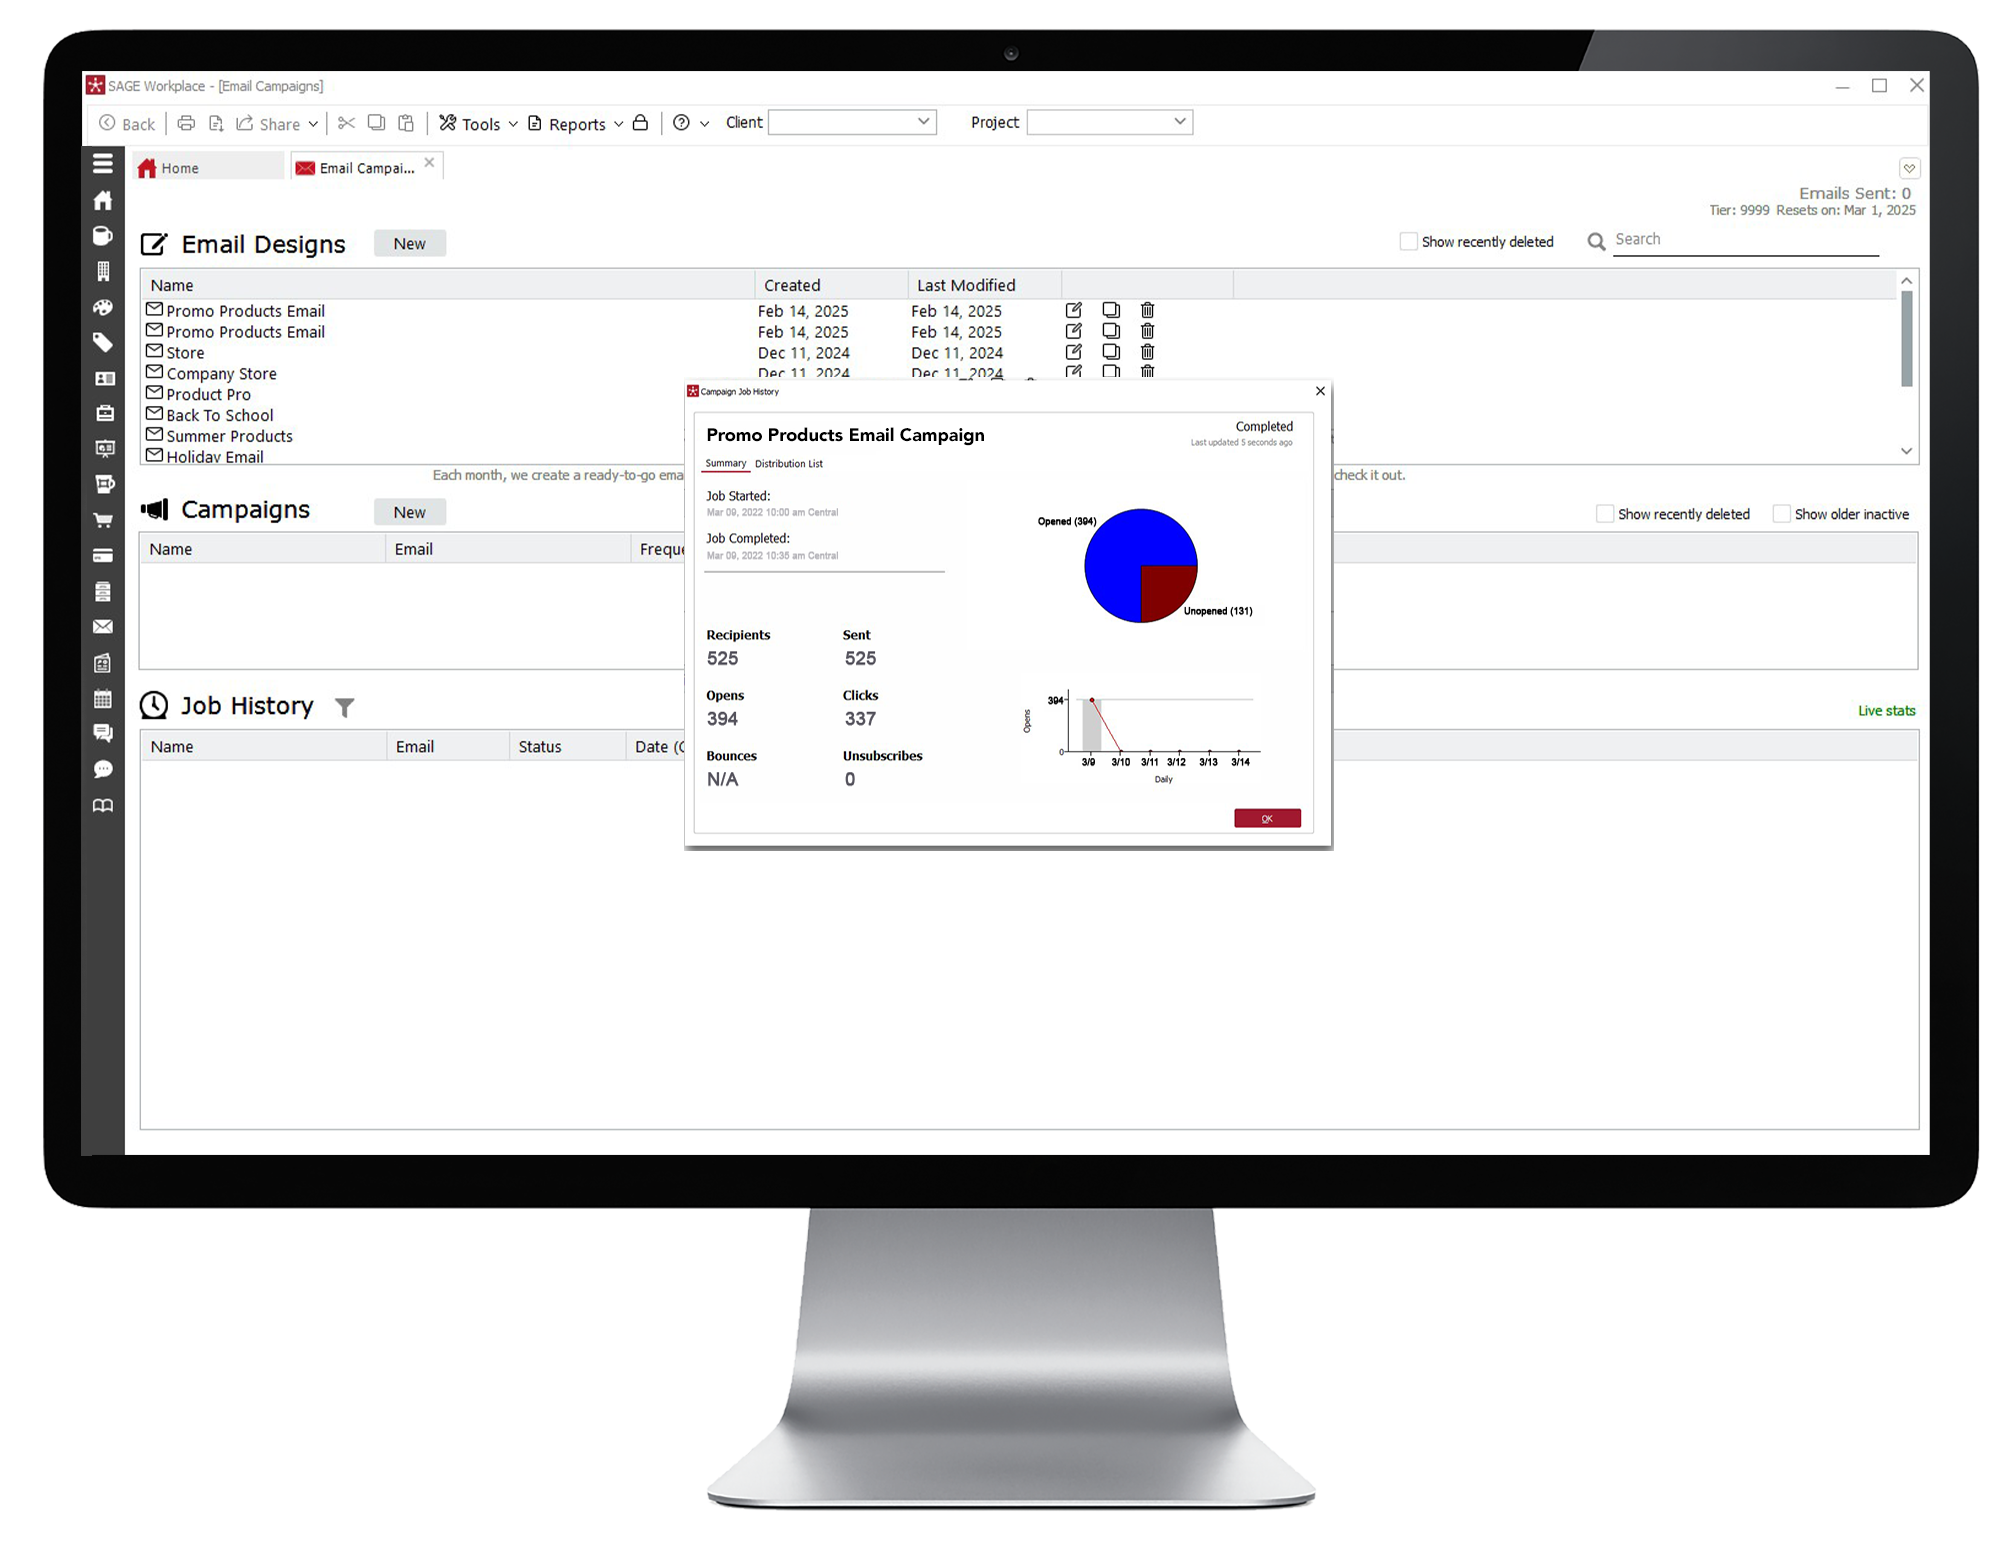
- Check over your email to ensure all the information is correct. You can also click View in Browser or Email Proof to view a proof in your browser or email. After your email is designed, return to the main Email Campaigns page. Don’t forget to save!
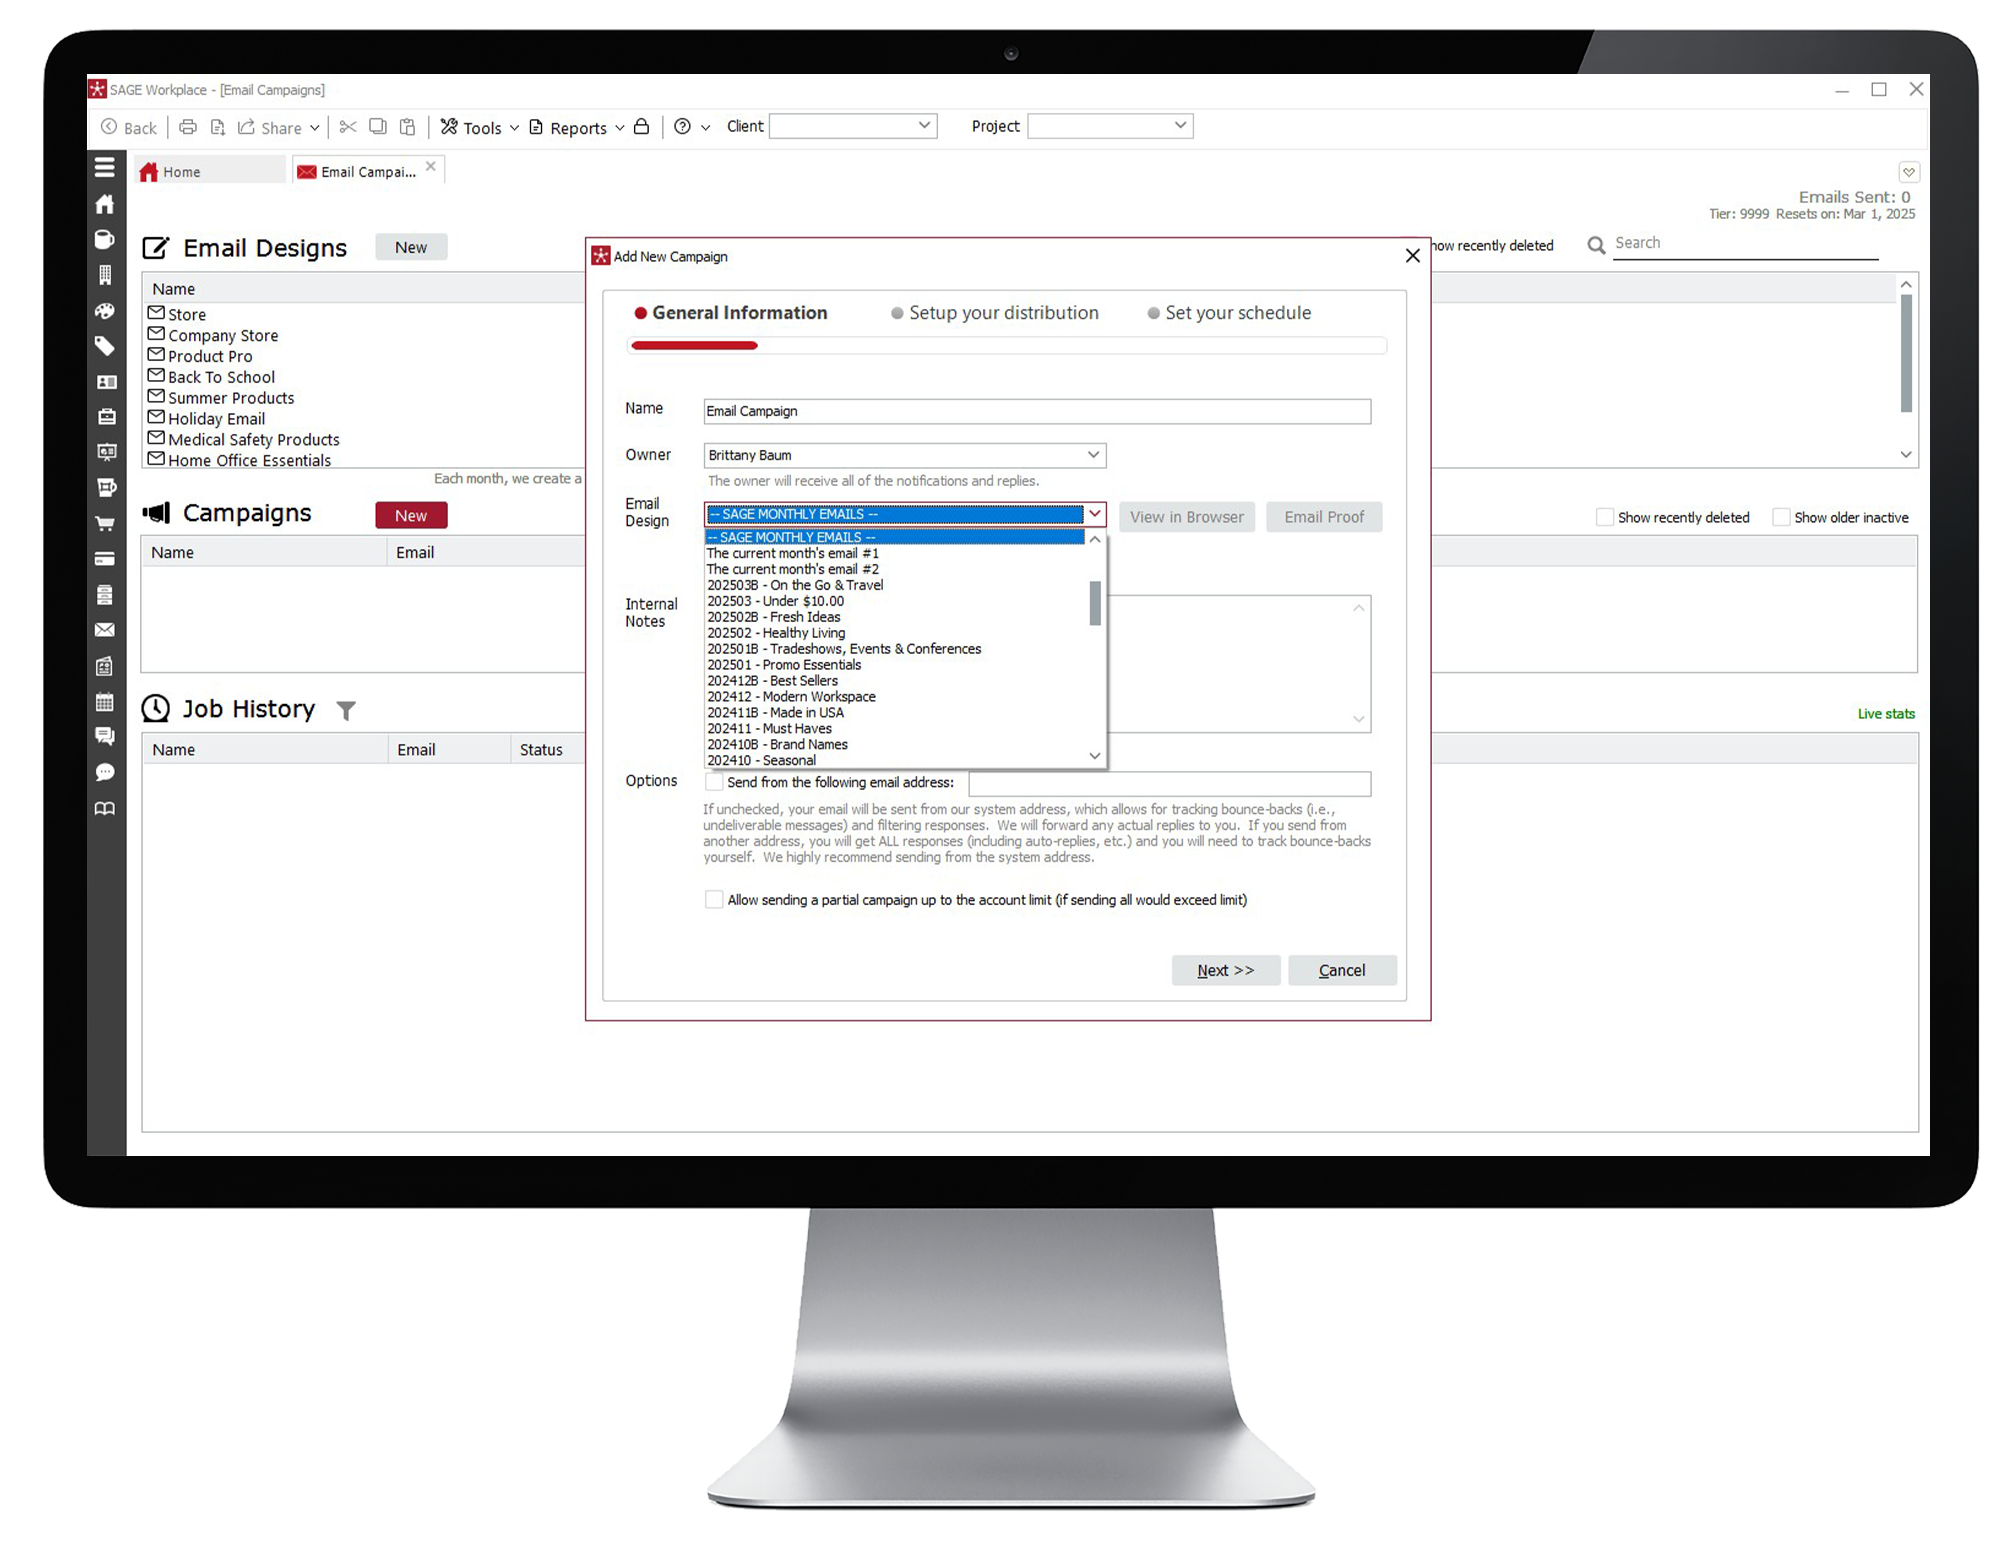
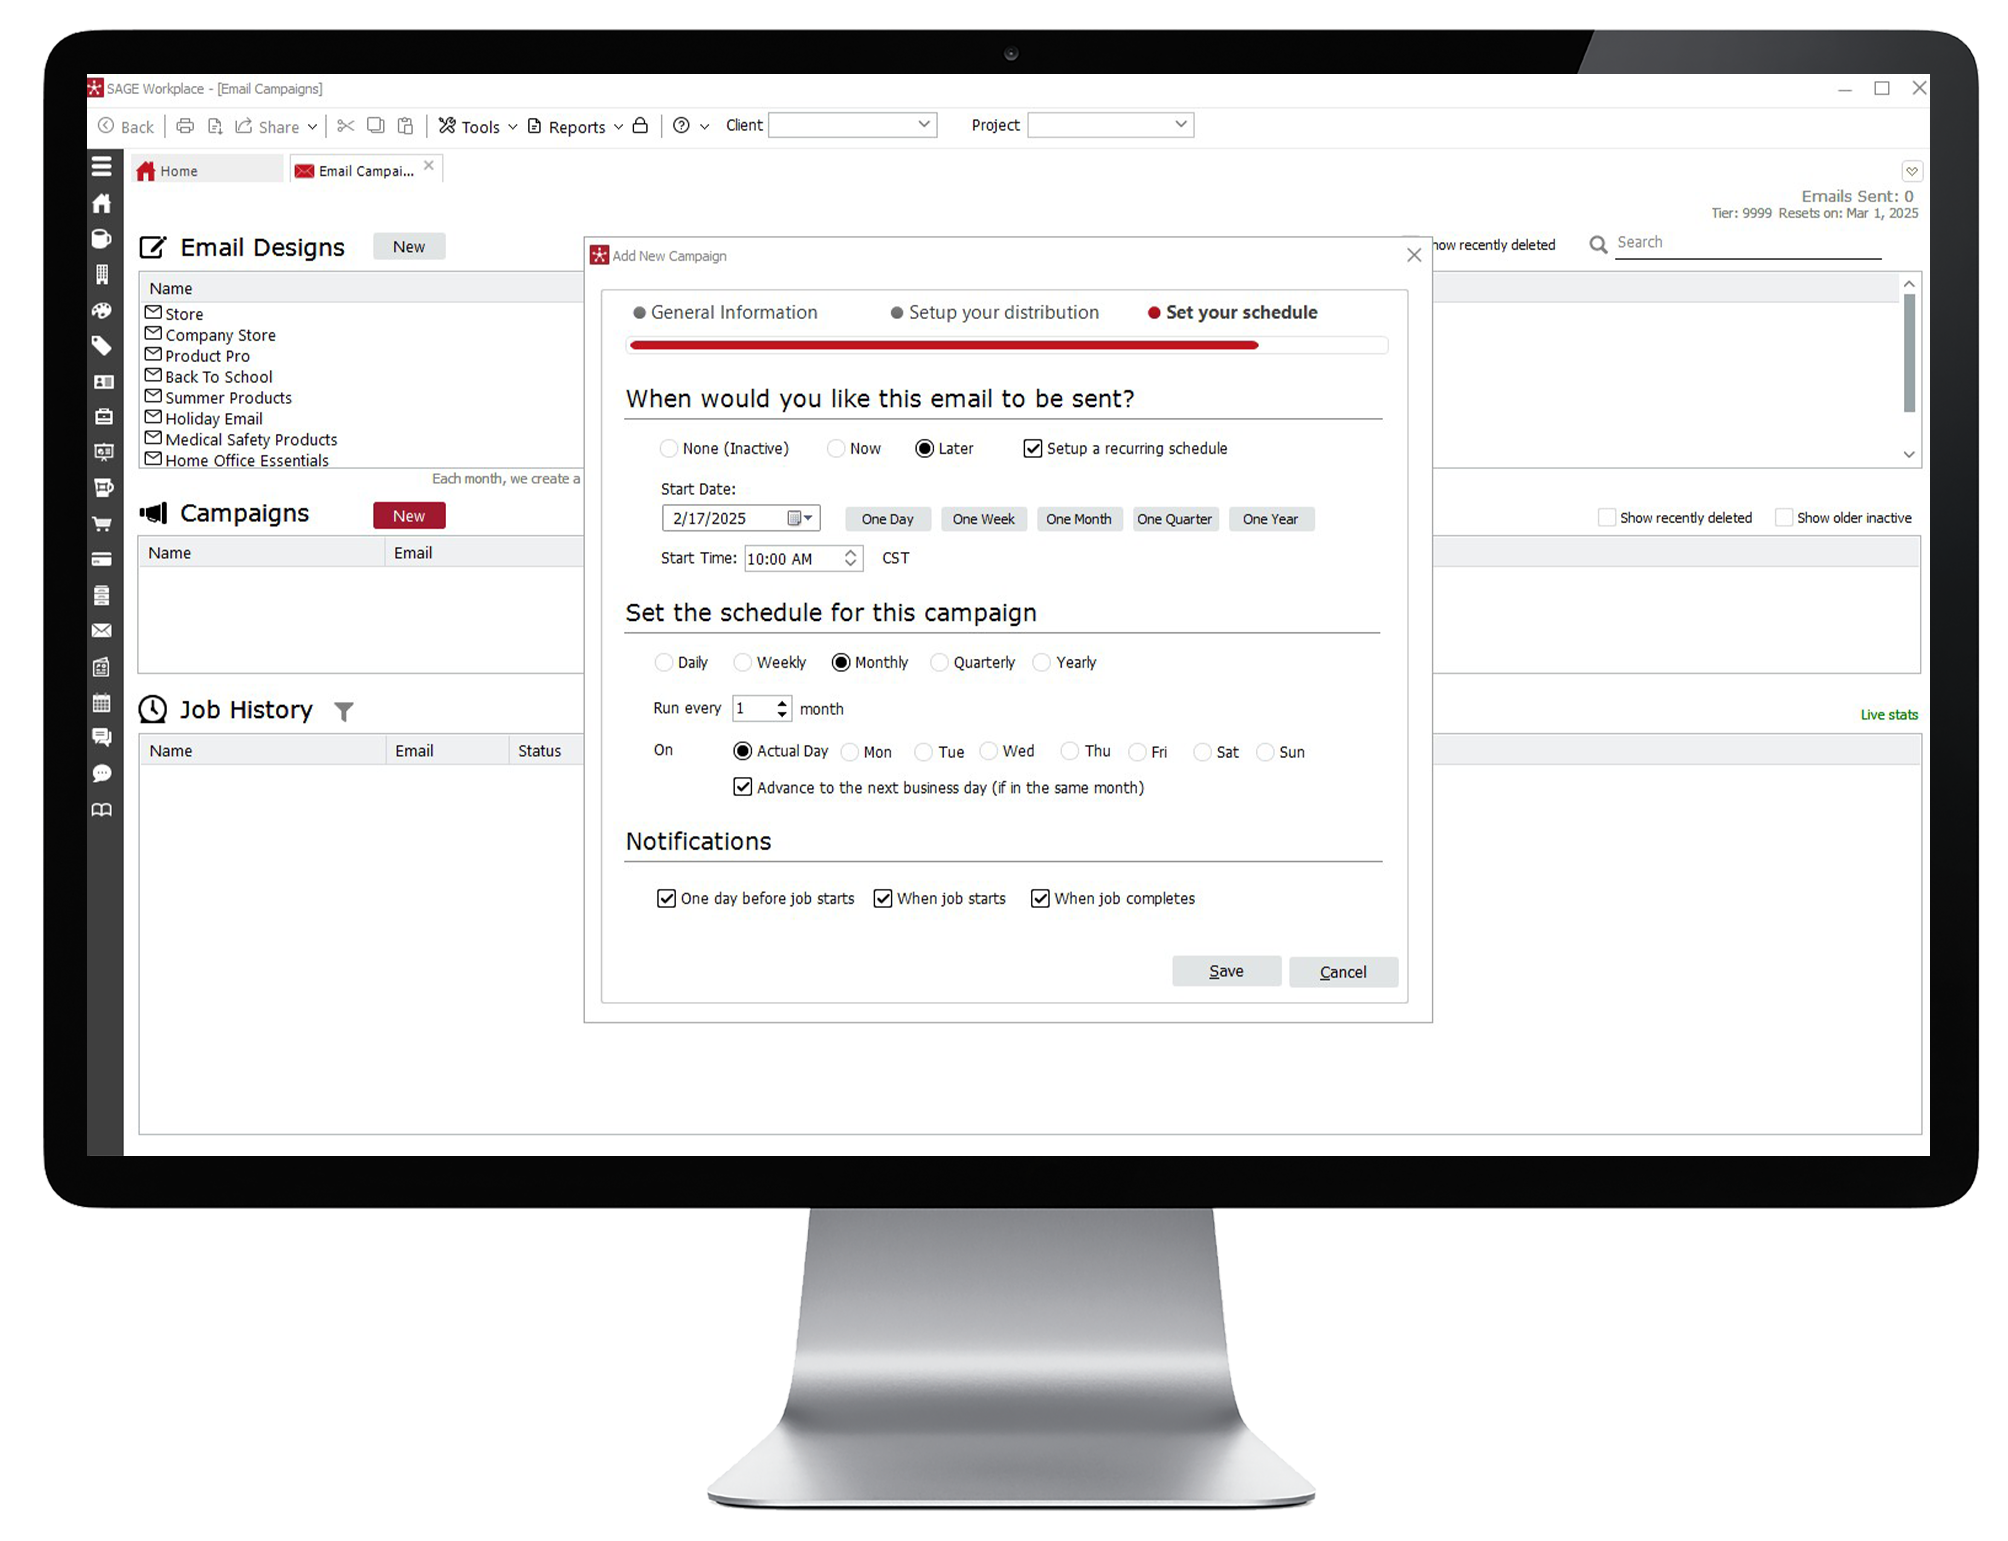
- Click New next to Campaigns and select your design from the drop-down menu, under “Your Email Designs”. Follow the same steps you would for a pre-designed email campaign to add your recipients and schedule your email.